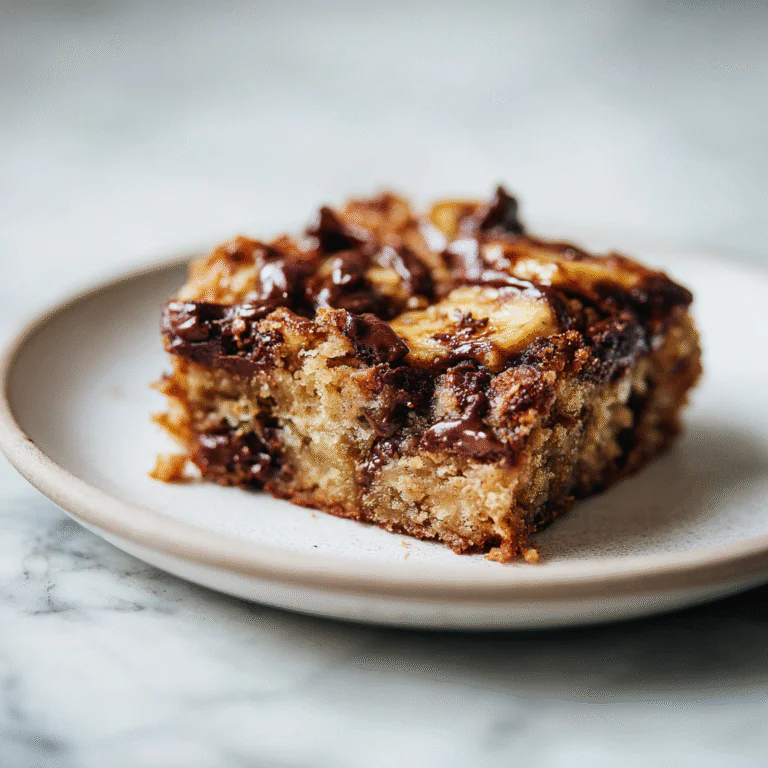
The Ultimate Loaded Oreo Rice Krispie Treats: A Cookies & Cream Dream 🍪✨
There is something undeniably nostalgic about the snap, crackle, and pop of a Rice Krispie treat. It takes us back to childhood kitchens, sticky fingers, and the simple joy of a sugar rush. But today, we aren’t just making the standard lunchbox snack. We are elevating the humble cereal bar into a decadent, bakery-style masterpiece. Welcome to the world of Loaded Oreo Rice Krispie Treats—a dessert that combines the buttery, marshmallow-pull goodness of the classic treat with the crunchy, chocolatey indulgence of America’s favorite cookie.
Imagine biting into a thick, chewy square where every mouthful offers the crunch of toasted rice cereal and the distinct, rich cocoa flavor of Oreos. Topped with a dual drizzle of white chocolate glaze and rich dark chocolate syrup, these bars are not just a snack; they are an event. Whether you are hosting a birthday party, looking for a quick no-bake dessert for a potluck, or simply craving something sweet on a Friday night, this recipe is your new holy grail.
In this extensive guide, we will walk you through everything you need to know to create the gooiest, most flavorful treats imaginable. We will dive into the science of the marshmallow melt, the importance of butter ratios, and why adding a pinch of salt changes the game entirely. Get your mixing bowls ready; we are about to make magic happen.
Why This Recipe Works: The Perfect Texture Balance ⚖️
Many people assume that making Rice Krispie treats is as simple as melting marshmallows and throwing in cereal. While that is technically true, the difference between a rock-hard brick and a soft, pull-apart delicacy lies in the details. This recipe works because it respects the ratio of goo-to-crunch.
By incorporating crushed Oreos, we introduce a new texture. The cream filling of the Oreos melts slightly into the warm marshmallow mixture, adding a vanilla richness that standard treats lack. The cookie wafers provide a density that contrasts beautifully with the airy rice cereal. Furthermore, the dual-chocolate drizzle on top isn’t just for aesthetics; it provides a creamy finish that coats the tongue, balancing the dryness of the cereal.
We also utilize a “double addition” method for the marshmallows. We melt the majority to act as the glue, but we fold in fresh mini marshmallows and Oreo chunks at the very end. This ensures that you get pockets of unmelted, fluffy marshmallow and distinct cookie crunch in every single bite. It is a textural symphony that elevates this from a kid’s snack to a gourmet dessert.
Ingredients 🥣
To achieve the result shown in the picture—a towering, drippy, delicious block of cookies and cream goodness—you need quality ingredients. Here is what you will need:
Loaded Oreo Rice Krispie Treats
Ingredients
Equipment
Method
- Prepare a 9×9 inch pan by lining it with parchment paper and lightly greasing it with butter or cooking spray.
- Roughly chop the Oreo cookies, keeping some large chunks for texture. Set aside.
- In a large pot over low heat, melt the butter completely.
- Add 3/4 of the marshmallows, salt, and vanilla to the pot. Stir constantly until completely melted and smooth.
- Remove from heat immediately. Fold in the Rice Krispies cereal until coated.
- Quickly fold in the chopped Oreos and the remaining 1/4 of the marshmallows.
- Transfer mixture to the prepared pan. Gently press into an even layer using slightly greased hands (do not pack tightly).
- Melt white chocolate chips with cream in the microwave in 30-second bursts. Drizzle over the treats.
- Finish with a drizzle of dark chocolate syrup. Let cool for 30 minutes before slicing.
Notes
- Unsalted Butter (6 Tablespoons) – European style butter with higher fat content is preferred for a richer flavor.
- Mini Marshmallows (1 bag / 16 oz) – Divided usage; ensure they are fresh and not stale for the best melt.
- Rice Krispies Cereal (5 Cups) – The classic toasted rice cereal provides the base structure.
- Oreo Cookies (20-25 cookies) – Roughly chopped, keeping the cream filling intact.
- Vanilla Extract (1 Teaspoon) – High-quality pure vanilla extract elevates the marshmallow flavor.
- Sea Salt (1/4 Teaspoon) – Essential to cut through the extreme sweetness of the marshmallows and chocolate.
- White Chocolate Chips (1/2 Cup) – For the melting drizzle on top.
- Heavy Cream (2 Tablespoons) – Mixed with white chocolate for a ganache-like consistency.
- Dark Chocolate Syrup or Melted Dark Chocolate (1/4 Cup) – For the final contrast drizzle.
Instructions 📝
Follow these steps carefully to ensure your treats remain soft and chewy rather than hard and brittle. Speed is key once the marshmallows are melted!

- Prepare the Pan: Line a 9×9 inch square baking pan with parchment paper or aluminum foil. Spray lightly with non-stick cooking spray or butter the foil generously to ensure easy removal later.
- Crush the Cookies: Take your Oreo cookies and place them in a zip-top bag. lightly crush them with a rolling pin. You want a mix of fine crumbs and large chunks. Do not pulverize them into dust; you want visible pieces in the final product. Set aside.
- Melt the Butter: In a large heavy-bottomed pot (a Dutch oven works best), melt the unsalted butter over medium-low heat. Let it melt slowly to avoid burning the milk solids.
- The Marshmallow Melt: Once the butter is melted, add the vanilla extract and salt. Stir briefly. Then, add about 3/4 of your bag of marshmallows to the pot. Reserve the remaining 1/4 cup for later.
- Stir Constantly: Stir the marshmallows continuously with a silicone spatula until they are completely melted and smooth. The mixture should look like thick, white lava. Remove the pot from the heat immediately. Note: Do not overcook the marshmallows, or the sugar will crystallize and make the treats hard.
- The Fold: Immediately pour the Rice Krispies cereal into the pot. Fold gently to coat the cereal in the marshmallow mixture.
- Add Mix-Ins: When the cereal is mostly coated but the mixture is still warm, add the chopped Oreos and the reserved mini marshmallows. Fold them in quickly so they distribute evenly but the chocolate chips don’t fully melt away.
- Press into Pan: Transfer the sticky mixture into your prepared pan. Crucial Step: Do not pack the mixture down tightly! Grease your hands with a little butter or use a piece of wax paper to gently press the mixture into the corners and flatten the top. Pressing too hard creates dense, brick-like treats.
- The Topping: In a small microwave-safe bowl, heat the white chocolate chips and heavy cream in 30-second intervals, stirring between each, until smooth. Drizzle this generously over the top of the treats. Follow this with a drizzle of dark chocolate syrup or melted dark chocolate for that professional bakery look seen in the image.
- Set and Serve: Allow the treats to sit at room temperature for at least 30 to 60 minutes to set. Once firm, lift the parchment paper out of the pan and slice into large squares.
The Science of the Gooey Marshmallow 🧪
Why do some Rice Krispie treats turn out hard enough to break a tooth? The answer lies in sugar chemistry. Marshmallows are essentially sugar, corn syrup, water, and gelatin whipped into a foam. When you heat them, you are breaking down the gelatin structure. However, if you apply too much heat or cook them for too long, you evaporate the water content and take the sugar to the “hard crack” stage.
To avoid this, we use low heat and remove the pot from the stove the second the marshmallows are smooth. Furthermore, the addition of butter coats the sugar molecules, preventing them from recrystallizing into a hard mass. The extra marshmallows added at the end (the “post-melt” addition) provide pockets of moisture that keep the texture interesting and soft days after making them.
Customization: Make It Your Own 🎨
While the Cookies and Cream version is spectacular, this base recipe is incredibly versatile. Here are a few variations you can try using the same techniques:
The Peanut Butter Lover
Swap the Oreos for chopped Reese’s Peanut Butter Cups. Stir 1/2 cup of creamy peanut butter into the melted marshmallow mixture before adding the cereal. Drizzle with melted peanut butter and chocolate on top.
Mint Chocolate Chip
Use Mint Oreos instead of regular Oreos. Add a drop of green food coloring to the marshmallow mixture if desired. This makes for a fantastic holiday treat or a refreshing summer dessert.
Red Velvet
Use Red Velvet Oreos and add a teaspoon of cocoa powder to the marshmallow melt. Top with a cream cheese glaze instead of white chocolate for a true cake-like experience.
Storage and Shelf Life 🥡
One of the best things about Rice Krispie treats is their shelf life, provided they are stored correctly. Air is the enemy here. If left uncovered, the marshmallows will dry out, and the cereal will stale.
Room Temperature: Store your cut squares in an airtight container at room temperature. Layer them with parchment paper to prevent sticking. They will stay fresh and soft for up to 3 days. Do not store them in the refrigerator! The cold temperature creates condensation and hardens the butter and marshmallows, resulting in a rock-hard texture that is unpleasant to eat.
Freezing: Yes, you can freeze these! Wrap each square individually in plastic wrap, then place them in a freezer-safe heavy-duty bag. They can be frozen for up to 6 weeks. To eat, remove a square and let it come to room temperature on the counter for about 15-20 minutes. This is a great way to portion control or prep ahead for a party.
Serving Suggestions for Parties 🎉
If you are serving these at a gathering, presentation matters. The image provided shows a rustic yet elegant plating style that you can easily replicate. Here are a few ideas:
The Dessert Bar: Cut the treats into smaller, bite-sized cubes and serve them on a tiered platter. Insert a toothpick or a lollipop stick into each one to make them mess-free “pops.”
Warm and À La Mode: Believe it or not, microwaving a square for just 5-8 seconds creates a gooey, warm dessert. Top it with a scoop of vanilla bean ice cream and extra crushed Oreos for a plated dessert that rivals any restaurant menu.
Gift Giving: These treats are sturdy enough for shipping or gifting. Place a square in a clear cellophane bag, tie it with a black and white ribbon to match the Oreo theme, and you have a perfect party favor or holiday gift.
Conclusion
The “Slutty” Oreo Rice Krispie Treat—or the Loaded Cookies and Cream Bar—is more than just a sugar fix. It is a texture lover’s paradise, combining the best elements of two iconic childhood favorites. By following the tips on temperature control, gentle folding, and the double-drizzle topping, you create a dessert that looks professionally made but requires zero baking skills.
So, grab that bag of marshmallows and that package of Oreos. It’s time to create a dessert that will have your friends and family begging for the recipe. Enjoy the crunch, the goo, and the chocolatey bliss!