
Are you ready to transport your kitchen into a professional bakery? There is something undeniably nostalgic and joyous about a classic pink donut. It’s the quintessential image of a treat—reminiscent of childhood cartoons, birthday parties, and sunny Saturday mornings. But here is the secret that big bakeries don’t want you to know: making the perfect, fluffy, melt-in-your-mouth yeast donut at home is entirely possible, and the results are often fresher and tastier than what you can buy.
In this comprehensive guide, we are going to dive deep into the art of the yeast donut. We aren’t making dense cake donuts today; we are aiming for that cloud-like interior with a slightly crisp, golden exterior, all enveloped in a sweet, luscious pink glaze that sets perfectly. Whether you are hosting a whimsical brunch, a birthday party, or simply craving a sweet comfort food, this recipe is your golden ticket.
We will cover the science of yeast, the secrets to the perfect fry, how to achieve that iconic pink glaze without it running off, and troubleshooting tips to ensure your batch comes out Instagram-ready every single time. Let’s get baking!
The Magic of Yeast: Why It Matters
Before we touch the flour, we must understand the soul of this donut: the yeast. Unlike cake donuts which rely on baking powder, these pink beauties rely on biological leavening. This is what creates those large, airy pockets inside the dough.
- Active Dry vs. Instant: We recommend Active Dry yeast for this recipe as blooming it in warm milk proves that your yeast is alive and ready to work.
- The Rise: Patience is key. The “proof” (or rise) allows the gluten network to relax and the gas bubbles to expand. Rushing this step leads to dense, tough donuts.
Creating the Perfect Texture
To achieve that signature “bakery” texture, we use a few specific techniques:
- Enriched Dough: We add butter, sugar, and eggs. This fat inhibits gluten formation slightly, resulting in a tender crumb rather than a chewy bread-like texture.
- Nutmeg: A pinch of fresh nutmeg is the “secret ingredient” in almost all donut shops. It gives that subtle, warm background note that screams “donut” to your brain.
- Double Rise: We let the dough rise once in the bowl, and again after cutting the shapes. This second rise is crucial for the “puff” when they hit the oil.
Frying 101: Fear No Oil
Many home bakers are intimidated by deep frying, but with a simple thermometer, it is foolproof.
- Temperature is King: You must maintain your oil between 350°F and 375°F (175°C-190°C).
- Too Cold: The donuts will soak up grease and become heavy/soggy.
- Too Hot: The outside will burn before the inside is cooked.
- The Vessel: Use a heavy-bottomed pot (like a Dutch oven) which retains heat better and prevents temperature fluctuations.
The Iconic Pink Glaze
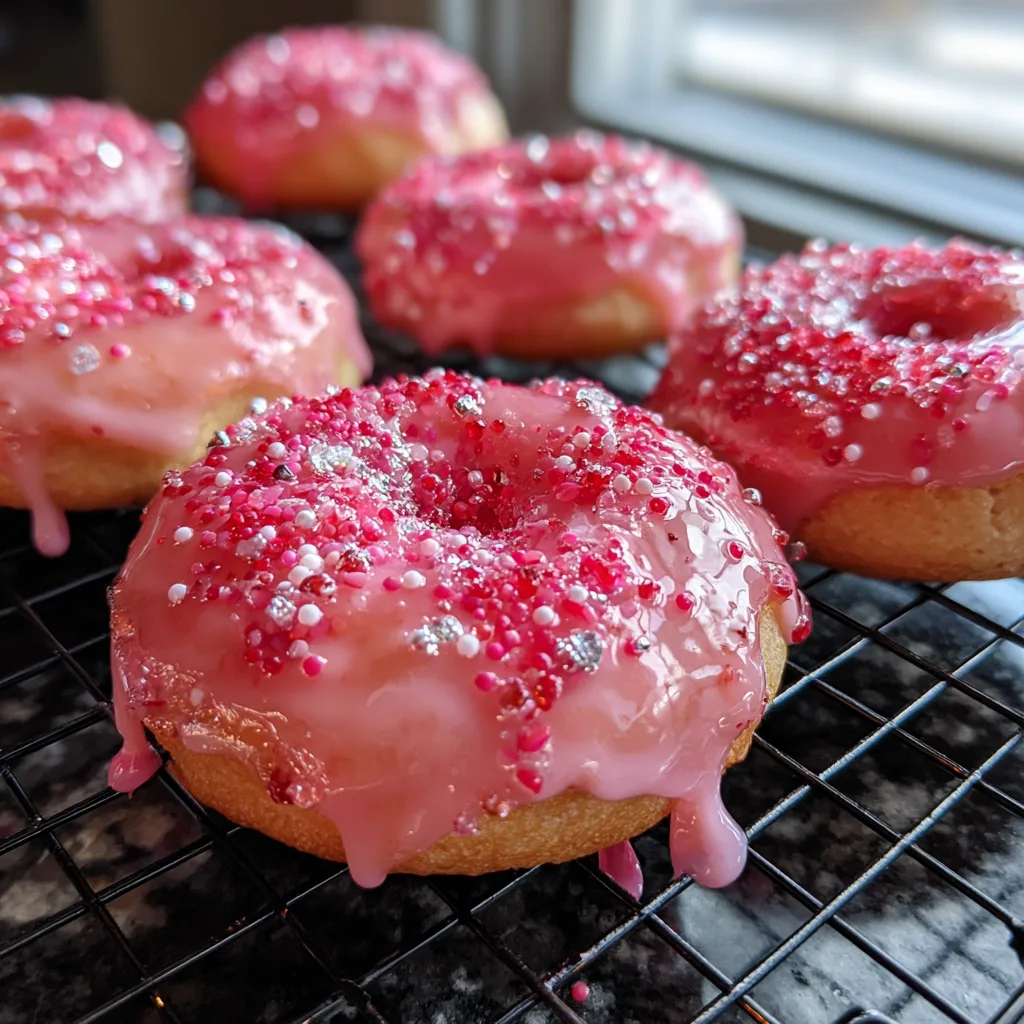
The glaze in the picture isn’t just sugar and water. To get that opaque, thick pink coating that holds the sprinkles, you need the right ratio of confectioners’ sugar to liquid. We use a touch of vanilla and a tiny pinch of salt to cut the sweetness. You can color this with high-quality gel food coloring for a vibrant hue, or use strawberry puree for a natural approach.
Ingredients
Classic Pink Glazed Donuts
Ingredients
Equipment
Method
- Combine warm milk and 1 tsp sugar. Sprinkle yeast on top and let bloom for 10 minutes.
- Add remaining sugar, eggs, melted butter, vanilla, nutmeg, and salt. Mix well.
- Gradually add flour and knead (stand mixer or hand) for 5-7 minutes until soft and tacky.
- Place dough in greased bowl, cover, and let rise for 1-1.5 hours until doubled.
- Roll dough to 1/2 inch thickness. Cut donuts and holes.
- Let cut donuts rise again on baking sheet for 30-45 minutes.
- Heat oil to 350°F (175°C). Fry donuts 1 minute per side until golden brown.
- Cool on wire rack. Whisk glaze ingredients until smooth.
- Dip warm donuts in glaze and top with sprinkles immediately.
Notes
For the Yeast Dough
- 1 cup whole milk, warmed to about 110°F (45°C)
- 1 packet (2 1/4 tsp) active dry yeast
- 1/3 cup granulated sugar
- 4 1/2 cups all-purpose flour (plus more for dusting)
- 1/2 teaspoon salt
- 1/4 teaspoon ground nutmeg (freshly grated is best)
- 2 large eggs, room temperature
- 1/3 cup unsalted butter, melted and slightly cooled
- 1 teaspoon vanilla extract
- Vegetable oil or Canola oil (for frying, about 1-2 quarts)
For the Pink Glaze
- 3 cups powdered sugar, sifted
- 1/2 teaspoon vanilla extract
- 4-5 tablespoons whole milk or heavy cream
- 2 drops pink gel food coloring (or 2 tbsp strawberry puree)
- Pinch of salt
For Toppings
- 1/2 cup Mixed sprinkles (Pink, Red, Silver Dragees, and Nonpareils)
Instructions
- Bloom the Yeast: In the bowl of a stand mixer (or a large bowl), combine the warm milk and 1 teaspoon of the granulated sugar. Sprinkle the yeast over the top and gently stir. Let it sit for 5-10 minutes until it becomes foamy and frothy. If it doesn’t foam, your yeast is dead, and you need to start over.
- Mix the Dough: Add the remaining sugar, eggs, melted butter, vanilla, nutmeg, and salt to the yeast mixture. Whisk until combined.
- Add Flour and Knead: Attach the dough hook to your mixer. Gradually add the flour, 1 cup at a time, mixing on low speed. Once all flour is added, increase speed to medium-low and knead for 5-7 minutes. The dough should be tacky (sticky to the touch) but should pull away cleanly from the sides of the bowl. Hand method: Stir with a wooden spoon until difficult, then knead by hand on a floured surface for 10 minutes.
- First Rise: Lightly grease a large bowl with oil or cooking spray. Place the dough inside, turning it once to coat it in oil. Cover with plastic wrap or a warm, damp towel. Place in a warm, draft-free spot and let it rise for 1 to 1.5 hours, or until doubled in size.
- Roll and Cut: Punch the dough down gently to release air bubbles. Turn it out onto a lightly floured surface. Roll the dough out to 1/2-inch thickness. Using a donut cutter (or a large round cutter and a smaller round cutter for the hole), cut out your donuts. Gather scraps, re-roll, and cut again.
- Second Rise: Place the cut donuts and donut holes on a baking sheet lined with parchment paper and lightly dusted with flour. Cover loosely with a towel and let rise again for 30-45 minutes. They should look puffy and airy.
- Heat the Oil: While the donuts are undergoing their second rise, heat 2-3 inches of oil in a heavy-bottomed pot or Dutch oven to 350°F (175°C). Use a clip-on candy thermometer to monitor the heat.
- Fry the Donuts: Carefully lower 2-3 donuts into the oil at a time. Do not overcrowd the pot, or the temperature will drop. Fry for about 1 minute per side, or until they are a rich golden brown.
- Cool: Remove donuts with a slotted spoon or spider tool. Place them on a wire rack lined with paper towels underneath to catch excess oil. Let them cool until they are warm to the touch, but not hot.
- Make the Glaze: While donuts cool, whisk together the sifted powdered sugar, vanilla, salt, and 3 tablespoons of milk. Add pink food coloring. Whisk until smooth. Add more milk, one teaspoon at a time, until the glaze is thick but pourable (like honey).
- Dip and Decorate: Dip the top of each warm donut into the glaze, twist slightly, and lift. Let the excess drip off for a second, then flip it onto the wire rack. Immediately sprinkle with your mix of pink, red, and silver sprinkles before the glaze hardens.
- Set: Allow the glaze to set for about 10-15 minutes before serving. Enjoy fresh!
Pro-Tips for Bakery Success
1. The “Proof” Box Hack
If your kitchen is cold, your dough won’t rise. Create a DIY proof box by placing a pan of boiling water on the bottom rack of your oven (turned off). Place your dough bowl on the top rack and close the door. The steam creates the perfect warm, humid environment for yeast.
2. Don’t Waste the Holes!
The donut holes are the baker’s treat! They fry much faster (about 30-45 seconds per side). Toss them in cinnamon sugar immediately after frying while they are still hot, or glaze them just like the big ones.
3. Oil Management
If your oil starts smoking, it is too hot and breaking down. Turn the heat off immediately. If the oil smells “fishy” or burnt, you must change it. Clean oil equals clean-tasting donuts.
4. Glaze Consistency
The biggest mistake people make is a runny glaze. It should be thick. If you dip a spoon in and lift it, the ribbon of glaze should take a few seconds to disappear back into the bowl. If it’s too thin, it will slide right off the donut, leaving a translucent, sticky mess. Add more powdered sugar if this happens.
Variations on the Pink Donut
While the classic vanilla pink donut is a staple, you can easily customize this recipe:
- Strawberry Fields: Use freeze-dried strawberry powder in the glaze instead of food coloring for a punchy, real fruit flavor.
- Lemon Raspberry: Add lemon zest to the dough and use raspberry juice to dye the glaze pink.
- Chocolate Drizzle: After the pink glaze sets, drizzle melted dark chocolate over the top for a decadent twist.
- Filled Donuts: Skip the hole cutter to make round donuts. Once fried and cooled, pipe strawberry jam or vanilla custard into the center using a bismark tip.
Storage and Shelf Life
Let’s be honest, homemade donuts are best eaten within 6 hours of frying. However, if you have leftovers:
- Room Temperature: Store in an airtight container for up to 2 days.
- Reviving Stale Donuts: Pop them in the microwave for 8-10 seconds. This re-softens the gluten and melts the glaze slightly, making them taste almost fresh again.
- Freezing: You can freeze unglazed fried donuts. Wrap tightly and freeze for up to 2 months. Thaw and glaze fresh.
Conclusion: The Joy of Scratch Baking
Making donuts from scratch is a labor of love, but the reward is incomparable. There is a specific pride in watching the dough rise, seeing it puff up in the golden oil, and dipping it into that vibrant pink sweetness. These pink glazed donuts are not just food; they are an experience—a centerpiece for celebrations or a way to make a regular Tuesday feel magical. So, dust off your apron, bloom that yeast, and get ready to make the best donuts you have ever tasted!


