
The Ultimate Fudgy Chocolate Cherry Brownies: A Black Forest Dream
There are few flavor combinations in the culinary world as iconic and seductive as dark chocolate and sweet, tart cherries. It is the backbone of the famous German Schwarzwälder Kirschtorte (Black Forest Cake), but today, we are taking those sophisticated flavors and condensing them into a simpler, denser, and arguably more satisfying format: the Fudgy Chocolate Cherry Brownie.
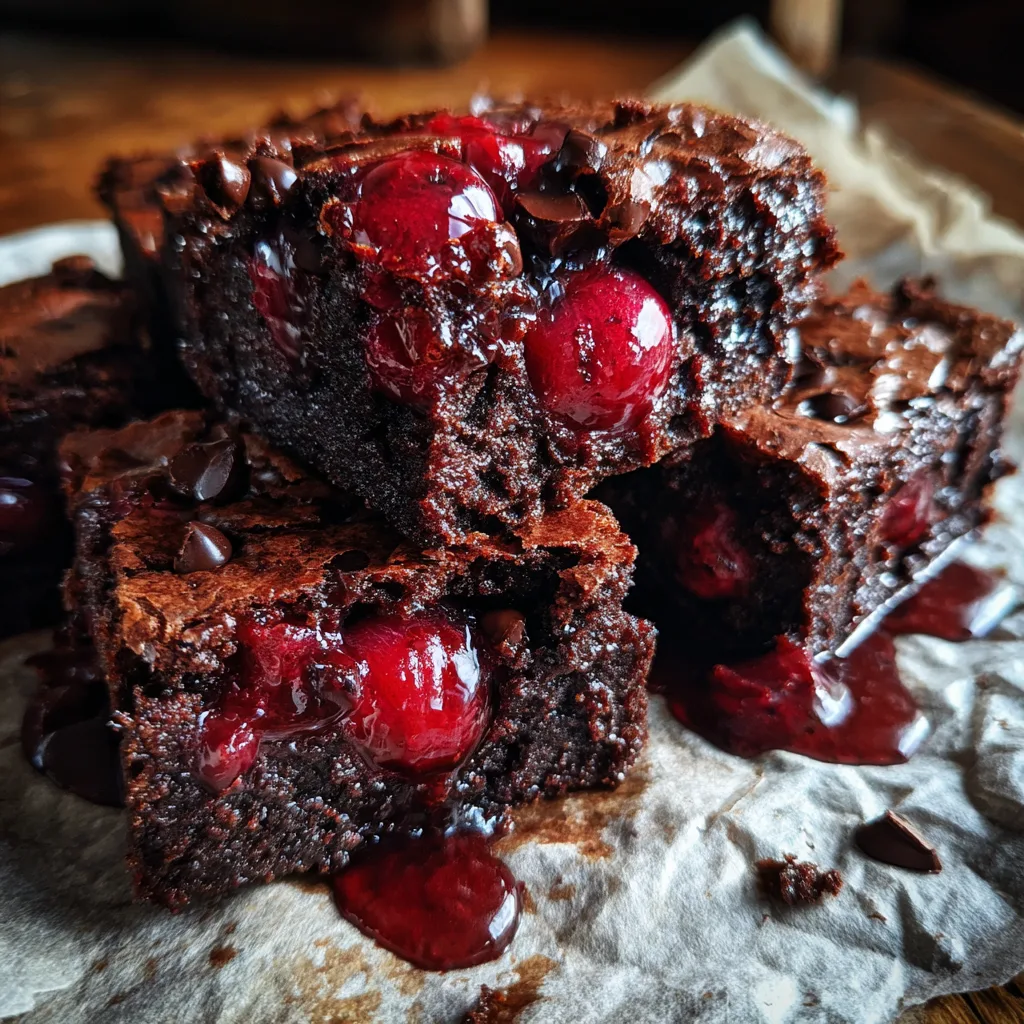
Forget the dry, cakey brownies of your past. These bars are unapologetically rich, boasting a texture closer to a chocolate truffle than a sponge cake. Each bite offers a deep, intense cocoa hit followed immediately by the bright, juicy burst of a red cherry. The moisture from the fruit seeps into the batter as it bakes, creating pockets of jammy sweetness that cut through the heaviness of the chocolate. Whether you are drowning in fresh summer cherries or looking to use up that bag of frozen fruit in the depths of winter, this recipe is your new go-to for pure indulgence.
In this comprehensive guide, we are going to dive deep into the science of the perfect brownie, discuss the best type of cherries to use (and how to prep them), and walk you through a foolproof method to achieve that coveted crinkly, shiny top. Grab a glass of milk; you are going to need it.
Why This Recipe Works
The success of a fruit-based brownie lies in moisture control. Fruit adds water, and too much water can turn a fudgy brownie into a soggy mess. This recipe combats that by using a high fat-to-flour ratio. By relying on melted butter and a mix of brown and white sugars, we create a batter that is dense enough to support the fruit without becoming pudding-like.
Furthermore, we use a dual-chocolate approach. We incorporate both melted high-quality bittersweet chocolate and Dutch-processed cocoa powder. The melted chocolate provides the fudgy texture and structural integrity, while the cocoa powder delivers that immediate, punchy chocolate flavor. The cherries, rather than being a garnish, are folded throughout, steaming slightly inside the batter to keep the crumb moist for days.
The Cherry Debate: Fresh, Frozen, or Jarred?
You can make these brownies year-round, but how you treat the fruit changes slightly depending on what you have.
- Fresh Cherries: The gold standard. They hold their shape best during baking. You will need to pit them and halve them. If they are very large, quarter them so you get a piece in every bite.
- Frozen Cherries: A fantastic convenient option. However, frozen fruit releases more water. Pro Tip: Do not thaw them completely before mixing, or they will bleed into the batter and turn it grey. Toss them in a teaspoon of flour before folding them in to help them stick to the batter.
- Jarred/Maraschino Cherries: If you want a sweeter, candy-like vibe, these work too. Just ensure you drain them thoroughly and pat them dry with paper towels. Excess syrup will ruin the texture of the brownie.
Ingredients Checklist
To create this masterpiece, you need to gather high-quality ingredients. Brownies have nowhere to hide; if you use cheap chocolate, they will taste like cheap chocolate.
The Chocolate Base
- 1 cup Unsalted Butter: Melted and slightly cooled.
- 8 oz Semi-Sweet or Bittersweet Chocolate (60-70%): Chopped roughly. Do not use chocolate chips for melting; they contain stabilizers that prevent smooth melting. Use baking bars.
- 1/2 cup Dutch-Processed Cocoa Powder: This is darker and smoother than natural cocoa.
The Structure
- 1 1/4 cups Granulated Sugar: Essential for the shiny crust.
- 1/2 cup Brown Sugar: Adds moisture and chewiness.
- 3 Large Eggs + 1 Yolk: The extra yolk adds richness and fudginess.
- 1 tsp Vanilla Extract: Enhances the chocolate flavor.
- 3/4 cup All-Purpose Flour: Just enough to hold it together. Do not over-measure!
- 1/2 tsp Salt: Vital to balance the sweetness.
The Mix-Ins
- 1 1/2 cups Cherries: Pitted and halved.
- 1/2 cup Chocolate Chips: Semi-sweet or dark, for texture.
Step-by-Step Instructions
Fudgy Chocolate Cherry Brownies
Ingredients
Equipment
Method
- Preheat oven to 350°F (175°C). Line a 9×9 inch pan with parchment paper, leaving overhang.
- Melt butter and chopped chocolate together until smooth. Let cool slightly.
- In a large bowl, beat eggs, yolk, granulated sugar, brown sugar, and vanilla for 5-7 minutes until pale and thick.
- Fold the melted chocolate mixture into the egg mixture.
- Sift flour, cocoa powder, and salt into the bowl. Fold gently until just combined.
- Fold in the cherries and chocolate chips.
- Pour batter into pan. Bake for 35-40 minutes until a toothpick comes out with moist crumbs (not wet batter).
- Cool completely in the pan before lifting out and slicing.
Notes
Phase 1: The Melt
1. Preheat and Prep:
Preheat your oven to 350°F (175°C). Line a 9×9 inch square baking pan with parchment paper, leaving an overhang on all sides. This is crucial for lifting the brownies out later. Grease the parchment lightly with butter.
2. Melt Butter and Chocolate:
In a large heatproof bowl set over a pot of simmering water (double boiler method), melt the butter and the 8 oz of chopped chocolate together. Stir until completely smooth and glossy. Remove from heat and let it cool for 5 minutes. (Alternatively, microwave in 30-second bursts, stirring in between).
Phase 2: The Ribbon Stage
3. Whisk Sugars and Eggs:
In a separate large bowl, combine the granulated sugar, brown sugar, eggs, egg yolk, and vanilla. Using an electric mixer (or a very strong arm and whisk), beat this mixture for exactly 5-7 minutes. Do not skip this. The mixture should become pale, thick, and fall off the beaters in “ribbons.” This step dissolves the sugar, which is the scientific secret to that paper-thin, shiny crinkle top.
Phase 3: The Batter
4. Combine:
Pour the cooled chocolate/butter mixture into the egg/sugar foam. Fold gently with a spatula until combined.
5. Dry Ingredients:
Sift the flour, cocoa powder, and salt directly into the bowl. Sifting is important here to get rid of hard cocoa lumps. Fold the dry ingredients in gently. Stop when you still see a few streaks of flour.
6. Fold in Fruit:
Add the pitted cherries and the chocolate chips. Fold just until everything is evenly distributed. Do not overmix, or you will develop gluten and get tough brownies.
Phase 4: The Bake
7. Pan and Bake:
Pour the thick batter into the prepared pan. Smooth the top with a spatula. If you want them to look like the photo, press a few extra cherry halves and chocolate chips into the top of the batter before baking.
8. Timing:
Bake for 35-40 minutes. The Toothpick Test: Brownies continue to cook after you take them out. A toothpick inserted into the center should come out with moist crumbs attached, not wet batter, but definitely not clean. If it’s clean, you have overbaked them.
9. The Hardest Part:
Remove from the oven and place on a wire rack. You must let these cool completely in the pan—for at least 2 to 3 hours. If you try to cut them hot, they will fall apart into a delicious but messy pile of goo. For the cleanest cuts, refrigerate them for an hour after they reach room temperature.
Troubleshooting Your Brownies
Problem: My brownies are cakey, not fudgy.
Solution: You likely used too much flour or baked them too long. Weigh your flour (1 cup = 120g) rather than scooping, which packs it down. Also, whipping air into the eggs helps the crust, but whipping the flour creates a cake structure. Fold gently at the end.
Problem: The cherries sank to the bottom.
Solution: This happens if the batter is too thin or the fruit is too wet. Ensure your batter is thick (the high chocolate content helps here). Tossing the cherries in a tablespoon of flour before adding them adds friction and helps them stay suspended.
Problem: No shiny crust.
Solution: The sugar wasn’t fully dissolved into the eggs. Make sure the butter/chocolate mixture is warm (not hot) when added, and really beat those eggs and sugar at the beginning.
Variations to Try
The “Drunken” Cherry:
Soak your dried or fresh cherries in Kirsch (cherry brandy), bourbon, or Amaretto for 30 minutes before baking. Drain them well before adding to the batter. This adds a sophisticated, adult kick.
White Chocolate Contrast:
Swap the semi-sweet chocolate chips for high-quality white chocolate chunks. The creamy, milky sweetness of white chocolate pairs beautifully with the tartness of the fruit.
Nutty Crunch:
Add 1/2 cup of toasted chopped walnuts or pecans. This brings it even closer to a traditional brownie texture profile and adds a nice savory note.
Serving Suggestions
While these brownies are incredible on their own, they can easily be transformed into a plated dessert:
- Black Forest Sundae: Serve a warm brownie with a scoop of vanilla bean ice cream, a drizzle of hot fudge sauce, and a dollop of whipped cream.
- Cherry Compote: Simmer extra cherries with a little sugar and lemon juice until they break down into a sauce. Pour this over the brownie for double the cherry flavor.
- Espresso Pairing: The bitterness of a shot of espresso cuts through the richness of the chocolate perfectly.
Storage
Because of the fresh fruit, these brownies have a shorter shelf life than plain ones.
- Room Temperature: Store in an airtight container for up to 2 days.
- Refrigerator: Keep them in the fridge for up to 5 days. They actually taste incredibly fudgy and dense when cold!
- Freezing: Wrap individual squares in plastic wrap and then foil. Freeze for up to 3 months. Thaw on the counter for an hour before eating.
Final Thoughts
The Chocolate Cherry Brownie is a celebration of textures and flavors. It is messy, it is rich, and it is undeniably comforting. It reminds us that baking doesn’t always have to be about precision decoration or delicate piping; sometimes, it’s just about good chocolate, fresh fruit, and the patience to let it bake to perfection. So, clean your workspace, preheat that oven, and get ready to fill your home with the intoxicating aroma of chocolate.


