Apple Crisp Recipe: The Ultimate Fall Dessert Guide 🍎
There’s nothing quite like the aroma of warm apples and cinnamon baking in your oven on a crisp autumn day. Apple crisp is the quintessential fall dessert that brings comfort, warmth, and delicious nostalgia to any table. Whether you’re hosting a holiday gathering, looking for a weeknight dessert, or simply craving something sweet and satisfying, this apple crisp recipe delivers every single time.
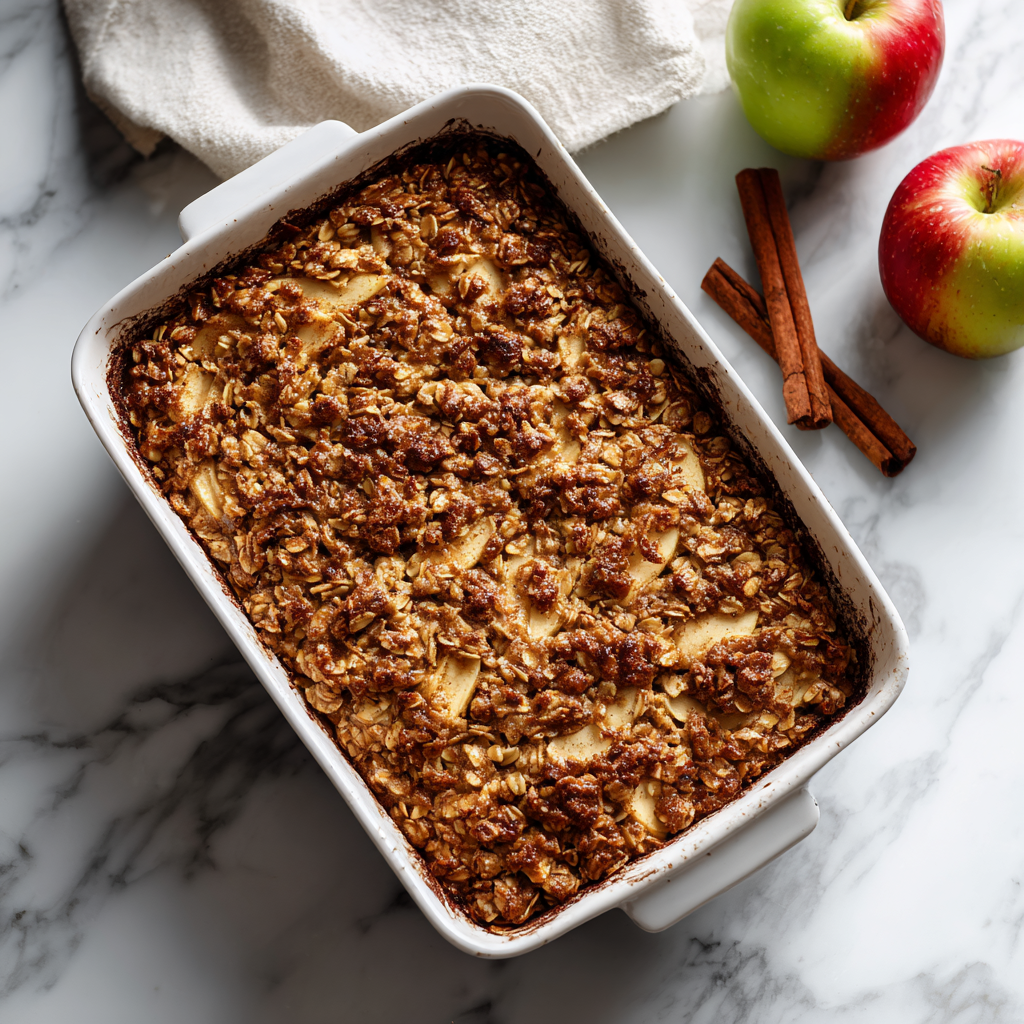
Unlike its cousin apple pie, apple crisp offers all the delicious flavors of baked apples with a fraction of the effort. No rolling out dough, no crimping edges, no stress. Just layers of tender, cinnamon-kissed apples topped with a buttery, golden oat crumble that bakes to perfection. It’s the kind of dessert that makes your house smell like heaven and disappears from the pan before it even cools.
Why This Apple Crisp Recipe Will Become Your Go-To Dessert 🌟
What makes this apple crisp recipe truly special is its perfect balance of textures and flavors. The apples become tender and juicy as they bake, releasing their natural sweetness while the cinnamon and spices add warmth and depth. Meanwhile, the topping transforms into a crunchy, buttery layer of oat goodness that provides the most satisfying contrast to the soft fruit below.
This recipe is incredibly forgiving and adaptable. You can use whatever apples you have on hand, adjust the sweetness to your preference, and even make it ahead of time. It’s perfect for beginner bakers who want impressive results without complicated techniques, yet delicious enough that experienced bakers will add it to their regular rotation.
The beauty of apple crisp lies in its simplicity. With just a handful of pantry staples and fresh apples, you can create a dessert that tastes like you spent hours in the kitchen. It’s the perfect recipe for those moments when you want homemade comfort food without the fuss. Plus, it’s naturally more forgiving than pie – even if your topping isn’t perfectly distributed or your apples are cut slightly unevenly, it will still taste absolutely amazing.
Choosing the Best Apples for Your Crisp 🍏
The secret to exceptional apple crisp starts with selecting the right apples. You want varieties that hold their shape during baking while offering a good balance of sweet and tart flavors. Granny Smith apples are a classic choice, providing that perfect tartness that prevents the dessert from becoming overly sweet. Their firm texture means they won’t turn to mush in the oven.
However, the very best apple crisp often comes from using a combination of apple varieties. Try mixing Granny Smith with Honeycrisp for sweetness, or add some Braeburn for complex flavor. Gala and Fuji apples contribute natural sweetness, while Pink Lady apples offer both firmness and a beautiful flavor profile. Mixing varieties creates layers of taste that make each bite interesting and delicious.
Avoid using Red Delicious apples, as they tend to become mealy when baked. Also steer clear of apples that are overly soft or mealy when raw – they’ll only get worse with heat. The ideal apples should be firm, crisp, and fresh. If you can find local, seasonal apples from a farmers market or orchard, even better! Fresh apples will always yield superior results.
The Science Behind the Perfect Crumble Topping 🥣
The topping is where apple crisp truly shines and distinguishes itself from other apple desserts. The combination of oats, flour, butter, and sugar creates multiple textures in a single layer. The oats provide nutty flavor and hearty crunch, the flour helps bind everything together, the butter adds richness and helps with browning, and the sugar caramelizes slightly for extra sweetness and crispy edges.
The key to perfect crumble topping is achieving the right consistency before baking. You want the mixture to resemble coarse crumbs – think wet sand that clumps when squeezed. If your topping is too dry, it won’t hold together; if it’s too wet, it will become dense rather than crispy. Cold butter is essential here, as it creates pockets of steam as it melts, leading to that coveted flaky, crispy texture.
Brown sugar is preferred over white sugar in the topping because it adds moisture and a deeper, almost caramel-like flavor that complements the apples beautifully. Some bakers add chopped nuts like pecans or walnuts to the topping for extra crunch and richness, while others incorporate a pinch of salt to balance the sweetness and enhance all the other flavors.
Ingredients 🛒
For the Apple Filling:
- 6-7 medium apples (about 3 pounds), peeled, cored, and sliced
- 1/4 cup granulated sugar
- 2 tablespoons all-purpose flour
- 1 teaspoon ground cinnamon
- 1/4 teaspoon ground nutmeg
- 1/4 teaspoon salt
- 1 tablespoon lemon juice
- 1 teaspoon vanilla extract
For the Crisp Topping:
- 1 cup old-fashioned rolled oats
- 3/4 cup all-purpose flour
- 3/4 cup packed brown sugar
- 1/2 teaspoon ground cinnamon
- 1/4 teaspoon salt
- 1/2 cup unsalted butter, cold and cut into small cubes
- 1/2 cup chopped pecans or walnuts (optional)
Instructions 📝
- Preheat your oven to 350°F (175°C). Grease a 9×13-inch baking dish with butter or non-stick cooking spray and set aside.
- In a large mixing bowl, combine the sliced apples with granulated sugar, 2 tablespoons flour, 1 teaspoon cinnamon, nutmeg, and 1/4 teaspoon salt. Add the lemon juice and vanilla extract, tossing everything together until the apples are evenly coated. The lemon juice prevents browning and adds brightness to balance the sweetness.
- Transfer the apple mixture to your prepared baking dish, spreading it out into an even layer. Make sure the apples are distributed uniformly so they cook evenly.
- In a separate medium bowl, combine the oats, 3/4 cup flour, brown sugar, 1/2 teaspoon cinnamon, and 1/4 teaspoon salt. Mix these dry ingredients together thoroughly.
- Add the cold butter cubes to the oat mixture. Using a pastry cutter, two forks, or your fingertips, work the butter into the dry ingredients until the mixture resembles coarse crumbs with some pea-sized butter pieces remaining. This should take about 3-4 minutes. If adding nuts, fold them in now.
- Sprinkle the crumble topping evenly over the apples, covering them completely. Don’t press down – you want the topping to remain light and loose so it can get crispy.
- Place the baking dish on the middle rack of your preheated oven. Bake for 45-55 minutes, until the topping is golden brown and crispy, and the apple filling is bubbling around the edges. If the topping is browning too quickly, tent loosely with aluminum foil.
- Remove from the oven and let the apple crisp cool for at least 15-20 minutes before serving. This allows the filling to thicken slightly and makes serving easier.
- Serve warm with vanilla ice cream, whipped cream, or a drizzle of caramel sauce for the ultimate dessert experience.
Pro Tips for Apple Crisp Perfection 💡
Temperature matters more than you might think. Serving your apple crisp warm (not hot) allows you to taste all the flavors while still enjoying that temperature contrast when you add cold ice cream. If your crisp has cooled completely, simply reheat individual portions in the microwave for 30-45 seconds.
Don’t skip the lemon juice in the filling. It might seem like a small amount, but it makes a significant difference in brightening the flavors and preventing the apples from oxidizing. The acidity also helps balance the sweetness and brings out the natural apple flavor.
For an extra-special touch, consider adding a handful of dried cranberries or raisins to the apple mixture. They plump up during baking and add little bursts of concentrated sweetness. You can also experiment with spices – try adding a pinch of cardamom or ginger for a unique twist on the classic recipe.
Storage and Make-Ahead Magic 🎯
Apple crisp is one of those wonderful desserts that actually tastes even better the next day as the flavors meld together. Store any leftovers covered in the refrigerator for up to 4 days. To reheat, place portions in a 350°F oven for about 10-15 minutes until warmed through, or microwave individual servings for 45-60 seconds.
You can also prepare apple crisp ahead of time in several ways. Assemble the entire dish up to 24 hours in advance, cover tightly with plastic wrap, and refrigerate until ready to bake. You may need to add 5-10 minutes to the baking time if going straight from the fridge to the oven. Alternatively, you can prepare the topping and apple filling separately, storing them in the refrigerator, then assemble and bake when ready.
For longer storage, apple crisp freezes beautifully. After baking and cooling completely, cover tightly with aluminum foil and freeze for up to 3 months. Thaw overnight in the refrigerator before reheating. You can also freeze unbaked apple crisp – just add about 15-20 minutes to the baking time when cooking from frozen.
Serving Suggestions That Elevate Your Dessert ✨
While apple crisp is absolutely delicious on its own, the right accompaniments can transform it from great to extraordinary. The classic pairing of warm apple crisp with cold vanilla ice cream creates that irresistible temperature and texture contrast that makes each bite memorable. As the ice cream melts into the warm apples and topping, it creates a luscious sauce that’s pure heaven.
For a slightly more sophisticated presentation, try serving your apple crisp with freshly whipped cream flavored with a touch of cinnamon or vanilla bean. Greek yogurt makes a wonderful lighter alternative that adds tangy creaminess without overwhelming sweetness. Caramel sauce drizzled over the top adds another layer of indulgent flavor that apple-lovers will appreciate.
Conclusion: Your New Favorite Fall Tradition 🍂
This apple crisp recipe represents everything we love about homemade desserts – simple ingredients, straightforward preparation, and absolutely delicious results. It’s the kind of recipe that becomes a family tradition, the dessert you make when apples are in season, and the treat that fills your home with the most wonderful aromas.
Whether you’re new to baking or a seasoned pro, this apple crisp delivers consistent, crowd-pleasing results every single time. It’s perfect for potlucks, holiday dinners, weeknight treats, or any occasion that calls for something sweet and comforting. The combination of tender, spiced apples and crunchy, buttery topping creates a dessert that’s greater than the sum of its parts.
So grab some fresh apples, gather your ingredients, and experience the joy of making this timeless dessert. Your kitchen will smell amazing, your family will be impressed, and you’ll have a new go-to recipe that you’ll make again and again. Happy baking!
Apple Crisp
Ingredients
Equipment
Method
- Preheat oven to 350°F (175°C). Grease a 9×13-inch baking dish.
- In a large bowl, combine sliced apples with granulated sugar, 2 tablespoons flour, 1 teaspoon cinnamon, nutmeg, and 1/4 teaspoon salt. Add lemon juice and vanilla extract, tossing to coat evenly.
- Transfer apple mixture to prepared baking dish, spreading into an even layer.
- In a medium bowl, combine oats, 3/4 cup flour, brown sugar, 1/2 teaspoon cinnamon, and 1/4 teaspoon salt.
- Add cold butter cubes to the oat mixture. Use a pastry cutter or fingertips to work butter into dry ingredients until mixture resembles coarse crumbs. Fold in nuts if using.
- Sprinkle crumble topping evenly over apples without pressing down.
- Bake for 45-55 minutes until topping is golden brown and filling is bubbling. Tent with foil if browning too quickly.
- Cool for 15-20 minutes before serving. Serve warm with vanilla ice cream or whipped cream.