
✨ The Elegance of French Pastry in Your Own Kitchen
There are very few desserts in the culinary world that command as much respect and universally evoke as much delight as a classic Crème Brûlée. The satisfying *crack* of the spoon breaking through a fragile, glass-like layer of deeply caramelized sugar to reveal a cold, luxuriously silky vanilla custard beneath is a sensory experience unlike any other. But what if we took that iconic, restaurant-quality dessert and wrapped it in a buttery, tender, melt-in-your-mouth pastry shell? Enter the Crème Brûlée Tart. 🍮✨
This dessert represents the absolute pinnacle of textural contrast. By combining the creamy, rich elements of a traditional baked custard with the crisp, crumbly structure of a French sweet shortcrust pastry (known as Pâte Sablée), we elevate the standard dessert into a show-stopping centerpiece. Whether you are hosting an elegant dinner party, celebrating a special anniversary, or simply looking to challenge your baking skills on a quiet Sunday afternoon, these mini tarts are guaranteed to leave a lasting impression.
While the name might sound intimidating, and the presentation looks like it belongs in a high-end Parisian patisserie, the magic of this recipe is that it is entirely achievable in a home kitchen. With a little patience, an understanding of the science behind custard, and a trusty kitchen torch, you can master this spectacular dish. Let’s embark on a deep dive into the art of making the perfect Crème Brûlée Tart.
🥧 Decoding the Perfect Tart Crust (Pâte Sablée)
The foundation of any great tart is its crust. For a wet, rich filling like custard, we need a crust that is not only delicious but also structurally sound. We use a Pâte Sablée, which translates to “sanded dough.” This dough is richer, sweeter, and far more crumbly than a standard pie crust. The high ratio of butter to flour, combined with the addition of egg yolks, creates a cookie-like texture that beautifully complements the creamy filling without becoming soggy. 🧈
The key to a successful Pâte Sablée is temperature control. Your butter must be cold. When you cut cold butter into the flour, you create tiny pockets of fat coated in starch. As the tart shell bakes, the water in the butter evaporates, creating steam and leading to that highly sought-after flaky, tender crumb. Furthermore, you must let the dough rest. Resting the dough in the refrigerator relaxes the gluten strands that were developed during mixing, preventing the crust from shrinking down the sides of your tart pan during the baking process.
Blind Baking: The Crucial Step
Because the custard filling is highly liquid and bakes at a very low temperature, the tart shell must be fully baked before the filling is added. This process, known as blind baking, involves lining the chilled pastry shell with parchment paper, filling it with pie weights (or dried beans/rice), and baking it until the edges are golden. The weights are then removed, and the crust is baked a little longer until the bottom is crisp and dry. Skipping this step will result in the dreaded “soggy bottom,” which ruins the textural magic of the dessert.
🍮 The Secret to a Silky Smooth Vanilla Custard
The soul of a crème brûlée is its custard base. A true, traditional custard relies on only a few humble ingredients: heavy cream, egg yolks, sugar, and vanilla. Because the ingredient list is so short, the quality of those ingredients is paramount. 🥚
Always opt for high-quality, full-fat heavy cream. This is not the time to substitute with milk or half-and-half, as the fat content is what provides the dense, velvety mouthfeel characteristic of a high-end dessert. For flavoring, a real vanilla bean is the absolute gold standard. Scraping the tiny black seeds directly into the cream infuses it with a profound, floral vanilla flavor that extract simply cannot match. If a fresh vanilla bean is unavailable, high-quality vanilla bean paste is an excellent alternative, as it still provides those beautiful, aesthetic black specks throughout the yellow custard.
🌡️ Tempering: The Culinary Technique You Need to Master
One of the most critical steps in making any custard is the tempering process. You are combining hot cream with raw egg yolks. If you pour the hot liquid directly into the eggs too quickly, you will scramble them, resulting in a lumpy, unpleasant texture. Tempering involves very slowly whisking a small amount of the hot cream into the egg yolks to gradually raise their temperature. Once the eggs are warmed up, you can safely whisk them back into the rest of the hot cream mixture. It requires a steady hand and constant whisking, but it is the secret to a flawless, silky smooth texture.
🔥 The Crowning Glory: Achieving the Perfect Brûlée Crack
The word “brûlée” literally means “burnt” in French. The signature of this dessert is the hard, caramelized sugar shell on top. Achieving this requires an intense, direct heat source, which is why a culinary butane torch is your best friend here. 🧨
To get the perfect crust, your custard must be completely set and very cold. You want to sprinkle an even, thin layer of granulated or caster sugar over the surface of the chilled tart. Too little sugar, and you won’t get a satisfying crack; too much, and you’ll end up with a thick, unyielding layer of hard candy that is difficult to break and overly sweet.
Hold the torch a few inches away from the surface and move it in slow, continuous circles. Watch as the sugar melts, bubbles, and transforms into a deep amber color. Do not be afraid to let it get quite dark; that slight bitterness of deeply caramelized sugar perfectly balances the rich sweetness of the custard below. Once torched, the tart should be served within an hour, as the sugar will eventually absorb moisture from the custard in the fridge and soften.
🛒 Ingredients
Gather the following high-quality ingredients to build your tarts from scratch:
For the Pâte Sablée (Tart Crust):
- – 1 ¼ cups all-purpose flour
- – ⅓ cup powdered sugar (confectioners’ sugar)
- – ¼ teaspoon fine sea salt
- – ½ cup (1 stick) unsalted butter, very cold and cubed
- – 1 large egg yolk
- – 1-2 tablespoons ice water (if needed)
For the Vanilla Bean Custard Filling:
- – 1 ½ cups heavy whipping cream
- – 1 vanilla bean, split and seeds scraped (or 1 tbsp vanilla bean paste)
- – 4 large egg yolks
- – ¼ cup granulated sugar
- – 1 pinch fine sea salt
For the Brûlée Topping and Garnish:
- – 4 tablespoons granulated sugar (for torching)
- – Fresh mint leaves (for garnish)
🍳 Instructions
Follow these steps meticulously to create bakery-quality tarts:
- Prepare the Dough: In a food processor, pulse together the flour, powdered sugar, and salt. Add the cold, cubed butter and pulse until the mixture resembles coarse meal with some pea-sized butter lumps remaining.
- Bind the Dough: Add the egg yolk and pulse a few times. If the dough seems too dry to come together, add ice water one tablespoon at a time, pulsing just until the dough begins to clump.
- Chill the Crust: Turn the dough out onto a clean surface, gather it into a ball, and flatten it into a disk. Wrap tightly in plastic wrap and refrigerate for at least 1 hour.
- Shape the Tarts: Preheat oven to 350°F (175°C). Roll out the chilled dough on a lightly floured surface to about ⅛-inch thickness. Cut out circles and press them gently into four 4-inch mini tart pans (preferably with removable bottoms). Trim the excess overhang. Prick the bottoms with a fork and freeze the pans for 15 minutes.
- Blind Bake: Line the chilled tart shells with crumpled parchment paper and fill to the brim with pie weights or dried beans. Bake for 15 minutes. Carefully remove the parchment and weights, then bake for another 10-15 minutes until the crusts are deeply golden brown and dry. Let them cool completely.
- Infuse the Cream: Lower the oven temperature to 300°F (150°C). In a medium saucepan, combine the heavy cream, vanilla bean seeds, and the empty vanilla pod. Heat over medium heat until it just begins to simmer (do not boil). Remove from heat, cover, and let steep for 15 minutes. Remove the vanilla pod.
- Whisk the Yolks: In a separate bowl, whisk together the 4 egg yolks, ¼ cup granulated sugar, and a pinch of salt until the mixture is pale yellow and slightly thickened.
- Temper the Eggs: Very slowly, whisking constantly, pour about ½ cup of the hot cream mixture into the egg yolks to temper them. Then, whisk the warmed egg yolk mixture back into the saucepan with the remaining cream.
- Bake the Custard: Place your pre-baked tart shells on a rimmed baking sheet. Carefully pour the custard filling into the shells, filling them almost to the top. Carefully transfer the baking sheet to the oven. Bake for 25-35 minutes, or until the edges of the custard are set but the center still has a slight jiggle.
- Chill Thoroughly: Remove the tarts from the oven and let them cool to room temperature on a wire rack. Once cooled, transfer them to the refrigerator and chill uncovered for at least 4 hours, preferably overnight, until completely firm.
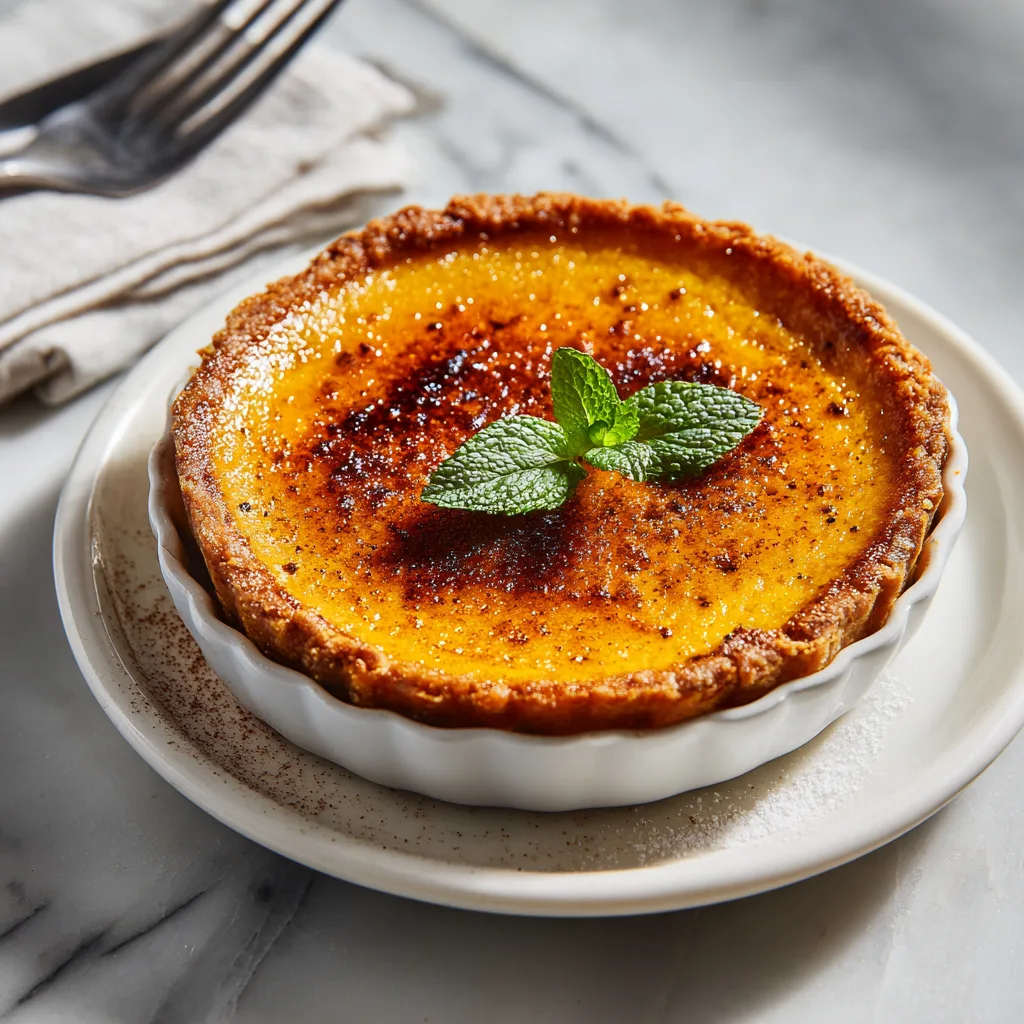
- Brûlée and Serve: Just before serving, sprinkle an even layer of granulated sugar (about 1 tablespoon per tart) over the surface of the custard. Use a kitchen torch to melt and caramelize the sugar until it forms a dark amber, hard crust. Garnish with a fresh mint leaf and serve immediately.
Mini Crème Brûlée Tarts
Ingredients
Equipment
Method
- Pulse flour, powdered sugar, and salt in a food processor. Add cold butter and pulse until crumbly. Add egg yolk and pulse until dough just comes together, adding ice water if dry.
- Form dough into a disk, wrap in plastic, and chill for 1 hour.
- Preheat oven to 350°F (175°C). Roll out dough and press into 4 mini tart pans. Prick bottoms and freeze for 15 minutes.
- Line tart shells with parchment, fill with pie weights, and blind bake for 15 minutes. Remove weights and bake another 10-15 minutes until golden brown. Cool completely.
- Lower oven to 300°F (150°C). In a saucepan, heat cream and vanilla bean to a simmer. Remove from heat and steep for 15 minutes.
- Whisk egg yolks, 1/4 cup sugar, and a pinch of salt. Slowly temper hot cream into the yolk mixture while whisking constantly.
- Pour custard filling into the baked tart shells. Bake for 25-35 minutes until the edges are set but the center still jiggles slightly.
- Cool tarts to room temperature, then refrigerate for at least 4 hours until fully firm.
- Before serving, sprinkle 1 tablespoon of sugar evenly over each tart. Melt and caramelize the sugar using a kitchen torch. Garnish with a mint leaf.
Notes
🎨 Flavor Variations to Elevate Your Tartlets
Once you have mastered the classic vanilla bean version, the culinary world is your oyster. The custard base acts as a magnificent blank canvas for an array of flavors. Here are a few sophisticated variations to try:
- Espresso Brûlée: Add 2 tablespoons of instant espresso powder to the heavy cream while heating. The bitterness of the coffee pairs exquisitely with the burnt sugar topping.
- Citrus Zest: Rub the zest of one large orange or lemon into the sugar before whisking it into the egg yolks. The bright, acidic oils from the citrus cut through the richness of the cream beautifully.
- Lavender Honey: Steep a tablespoon of culinary dried lavender in the hot cream, strain it out, and substitute half of the granulated sugar in the custard with high-quality honey for a delicate, floral, springtime dessert.
- Chocolate Base: Spread a thin layer of melted dark chocolate over the bottom of your blind-baked tart crust and let it set before adding the custard. This creates a hidden chocolate surprise at the bottom of the tart!
🍷 Pairing Suggestions for Your Dessert Course
A dessert this refined deserves a complementary beverage. Because the Crème Brûlée Tart is intensely rich, sweet, and creamy, you want to pair it with something that offers a slight acidic contrast or a complementary sweetness. A late-harvest Riesling or a classic French Sauternes are exceptional choices. The honeyed, apricot notes in a Sauternes mirror the caramelized sugar perfectly. If you prefer a non-alcoholic pairing, a strong, bitter espresso or an astringent Earl Grey tea provides a magnificent palate cleanser between bites of the luscious custard.
❄️ Making Ahead and Proper Storage Techniques
When hosting, timing is everything. The brilliant part about this recipe is that it is highly conducive to making ahead of time. In fact, it requires it!
Make Ahead: You can bake the tart shells up to two days in advance; just store them in an airtight container at room temperature. The entire tart (crust and custard filling) can be baked, cooled, and stored in the refrigerator for up to 3 days.
The Crucial Rule: Do not torch the sugar topping until the exact moment you are ready to serve. If you torch the sugar and place the tart back in the fridge, the humidity will melt your beautiful, brittle caramel into a sticky syrup within hours. Torch, garnish with mint, and serve immediately to your awestruck guests.
❓ Frequently Asked Questions (FAQ)
Can I make this dessert without a kitchen torch?
While a torch is highly recommended for precision and safety, you can use your oven’s broiler. Place the chilled, sugar-topped tarts on a baking sheet and place them directly under a preheated broiler. Watch them like a hawk, as they can go from beautifully caramelized to completely burnt in seconds. The downside to this method is that it can warm up the custard underneath, losing that hot/cold contrast.
Why did my custard crack in the oven?
Cracking is a sign of overbaking. Custard continues to cook gently as it cools due to residual heat. You want to pull the tarts from the oven when the very center still has a slight, gelatinous wobble. If it looks completely firm in the oven, it is already overcooked.
Can I use store-bought pie crust to save time?
While you technically can, it is not recommended. Store-bought pie dough lacks the buttery richness, sweetness, and crumbly texture of a Pâte Sablée, which is essential for balancing the texture of this specific dessert.
✨ Conclusion: A Dessert Experience to Remember
Creating a Crème Brûlée Tart from scratch is a labor of love, but it is a profoundly rewarding culinary project. It forces you to slow down, practice essential pastry techniques, and appreciate the alchemy of transforming simple ingredients—flour, butter, eggs, cream, and sugar—into a masterpiece of flavor and texture.
The next time you want to end a meal with a standing ovation, pull out your tart pans and your kitchen torch. From the delicate, buttery crunch of the crust to the silky, vanilla-flecked custard and the satisfying shatter of the caramelized top, every single bite is a testament to the beauty of French baking. Put on your apron, embrace your inner pastry chef, and enjoy the delicious journey! 🍽️💛


