
The Ultimate Salted Caramel Shortbread Snowflake Cookies ❄️
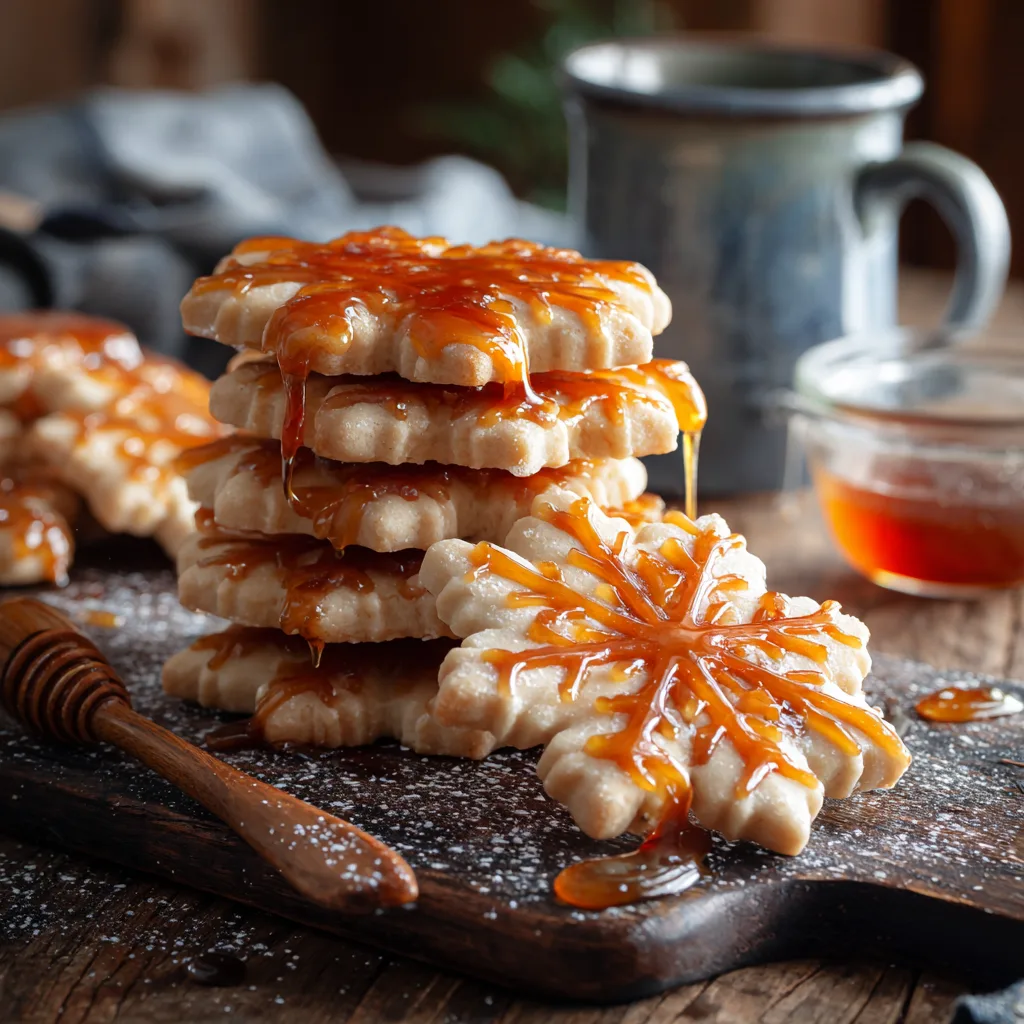
There is something undeniably magical about the combination of buttery, melt-in-your-mouth shortbread and the rich, complex sweetness of salted caramel. It’s a pairing that feels both nostalgic and indulgently grown-up. One look at these Salted Caramel Shortbread Snowflake Cookies, with their delicate shape and decadent, glossy drizzle, and you know you’re in for a special treat. They are the perfect addition to any holiday cookie box, a stunning centerpiece for a festive dessert spread, or simply a cozy companion for a warm mug of coffee on a chilly day.
This recipe takes the classic, humble shortbread and elevates it into a show-stopping dessert. We aren’t just making cookies; we’re creating an experience. From the satisfying snap of the cookie to the chewy, buttery pull of the homemade caramel, every bite is a symphony of textures and flavors.
Let’s explore what makes this recipe a cut above the rest and how you can achieve that bakery-perfect result in your own kitchen.
The Secret to Perfect Shortbread: It’s All About the Butter 🧈
Shortbread is a simple dough, relying primarily on three ingredients: butter, sugar, and flour. Because there are no eggs or leavening agents like baking powder or soda to hide behind, the quality of your ingredients is paramount.
The most crucial element is the butter. It is the primary flavor carrier and responsible for that signature “short” texture—meaning it’s tender, crumbly, and melts away on your tongue. For the best results, use a high-quality, high-fat European-style butter. The lower water content in these butters means a more concentrated flavor and a better, less tough crumb.
Another key is to handle the dough as little as possible. Overworking the dough develops gluten in the flour, which is great for chewy bread but the enemy of tender shortbread. We want to mix just until the dough comes together. This ensures your snowflakes remain delicate and don’t turn into tough, chewy discs.
Mastering Homemade Salted Caramel 🍯
The golden drizzle in the photo is not store-bought ice cream topping. It’s a luxurious, homemade salted caramel sauce that is surprisingly easy to make. The difference in flavor between homemade and store-bought is night and day.
The process starts with caramelizing sugar. This is where the magic happens—sugar crystals melt and break down, creating hundreds of new flavor compounds ranging from nutty to buttery to slightly bitter. The key is patience and a watchful eye. You want to take the sugar to a deep amber color to develop that rich flavor, but not so far that it burns.
Once the sugar is caramelized, we stop the cooking process by adding butter and heavy cream. This is the dramatic part where the mixture will bubble and steam violently. Do not be alarmed; just keep whisking carefully. The addition of fats turns the brittle hard caramel into a smooth, pourable sauce. Finally, a generous pinch of sea salt is added. The salt doesn’t make the caramel taste salty; rather, it counteracts the sweetness and makes the buttery, toffee notes pop.
The Art of the Drizzle ✨
The final step, and the one that makes these cookies look so irresistible, is the caramel drizzle. The key to a perfect drizzle is the temperature of the caramel.
If the caramel is too hot, it will be too thin and will run right off the cookie, pooling at the bottom. If it’s too cold, it will be thick, gloopy, and impossible to drizzle delicately. The ideal consistency is warm—it should flow easily from a spoon but hold its shape once it hits the cookie.
For the most professional look, you can transfer the warm caramel to a piping bag with a small round tip, or simply snip a tiny corner off a ziplock bag. This gives you more control than using a spoon. Start from the center of the snowflake and work your way out to the points, or go for a more rustic, artistic zigzag pattern. There’s no wrong way to do it, as long as there’s plenty of caramel on every cookie!
Salted Caramel Shortbread Snowflake Cookies
Ingredients
Equipment
Method
- Cream softened butter, powdered sugar, vanilla, and salt until light and fluffy.
- Gradually mix in flour on low speed until just combined. Do not overmix.
- Form dough into a disk, wrap in plastic, and chill for at least 1 hour.
- Preheat oven to 325°F (160°C). Roll out dough to 1/4 inch thick.
- Cut out snowflake shapes and place on parchment-lined baking sheets.
- Bake for 12-15 minutes until edges are pale golden. Cool completely on wire racks.
- For caramel: Melt sugar in a saucepan over medium heat until deep amber color.
- Remove from heat and carefully whisk in cubed butter until melted.
- Slowly whisk in heavy cream until smooth, then stir in flaky sea salt.
- Let caramel cool slightly, then drizzle over cooled cookies. Let set before serving.
Notes
Ingredients 🥣
For the Shortbread Cookies:
- 1 cup (2 sticks) unsalted butter, softened to room temperature
- ¾ cup powdered sugar (confectioners’ sugar)
- 1 teaspoon pure vanilla extract
- ½ teaspoon fine sea salt
- 2 ¼ cups all-purpose flour
For the Salted Caramel Sauce:
- 1 cup granulated sugar
- 6 tablespoons unsalted butter, cut into cubes, at room temperature
- ½ cup heavy cream, at room temperature
- 1 teaspoon flaky sea salt (like Maldon), plus more for sprinkling
Instructions 📝
1. Prepare the cookie dough:
In the bowl of a stand mixer fitted with the paddle attachment, beat the softened butter, powdered sugar, vanilla extract, and salt on medium speed until the mixture is pale, light, and creamy, about 3-4 minutes. Scrape down the sides of the bowl as needed.
2. Add the flour:
Turn the mixer to the lowest speed and gradually add the all-purpose flour. Mix just until the dough comes together and no streaks of dry flour remain. Do not overmix. The dough will be soft.
3. Chill the dough:
Shape the dough into a flattened disk, wrap it tightly in plastic wrap, and refrigerate for at least 1 hour, or until it is firm enough to roll out. This step is crucial to prevent the cookies from spreading and losing their sharp snowflake shape in the oven.
4. Roll and cut:
Preheat your oven to 325°F (160°C). Line two baking sheets with parchment paper. On a lightly floured surface, roll out the chilled dough to a thickness of about ¼ inch. Using a snowflake-shaped cookie cutter (about 3-4 inches in diameter), cut out cookies and carefully transfer them to the prepared baking sheets, leaving about an inch of space between them. Re-roll scraps once to cut more cookies.
5. Bake the cookies:
Bake for 12-15 minutes, or until the cookies are set and pale golden brown around the edges. They should not get too dark. Let them cool on the baking sheet for 5 minutes before transferring them to a wire rack to cool completely.
6. Make the caramel sauce:
While the cookies are cooling, make the caramel. Place the granulated sugar in an even layer in a medium-sized, heavy-bottomed saucepan. Heat over medium heat, whisking gently as the sugar begins to melt. It will clump at first, then melt completely into a clear liquid. Continue to cook, swirling the pan occasionally (do not whisk at this point), until the sugar turns a deep amber color. Watch it closely, as it can go from perfect to burnt in seconds.
7. Add butter and cream:
Once the sugar reaches the desired color, immediately remove the pan from the heat. Carefully add the cubed butter. The mixture will bubble vigorously. Whisk rapidly until the butter is completely melted and incorporated.
8. Finish the sauce:
Slowly pour in the heavy cream while continuing to whisk. Again, the mixture will bubble. Whisk until the sauce is smooth and uniform. Stir in the flaky sea salt. Let the caramel cool for about 10-15 minutes so it thickens slightly but is still pourable.
9. Decorate:
Arrange the completely cooled cookies on a wire rack set over a sheet of parchment or waxed paper (to catch drips). Using a spoon or a piping bag, drizzle the warm caramel generously over each snowflake cookie. For an extra sparkle and crunch, sprinkle a few more flakes of sea salt on top of the wet caramel. Let the caramel set for at least 30 minutes before serving or stacking.
Pro-Tips for Baking Success 🏆
To ensure your cookies turn out picture-perfect, keep these expert tips in mind.
- Room temperature ingredients are key: For the cookie dough, your butter must be soft enough to cream properly with the sugar. For the caramel, adding cold cream or butter to hot sugar can cause it to seize and lump. Take everything out of the fridge at least an hour before you start.
- Don’t skip the chill: Chilling the cut cookies for another 15 minutes in the fridge right before they go into the oven helps set the butter and ensures the sharpest possible edges on your snowflake shape.
- Caramel safety: Hot sugar is extremely hot and sticky. Be very careful when making caramel. Use a pot with high sides to contain the bubbling, and keep children and pets away from the stove.
- Make-ahead: The shortbread dough can be made and kept in the fridge for up to 3 days before rolling and baking. The baked, undrizzled cookies can be stored in an airtight container for up to a week. The caramel sauce can be made ahead and stored in a jar in the fridge for up to 2 weeks; just reheat it gently in the microwave or on the stove until pourable before using.
Conclusion
These Salted Caramel Shortbread Snowflake Cookies are a labor of love that is absolutely worth the effort. The combination of textures and flavors is truly spectacular, making them a memorable treat for any occasion. Whether you’re baking for a holiday party, a cookie exchange, or just to treat yourself, these cookies are guaranteed to bring a little bit of magic and a whole lot of deliciousness to your day. Enjoy every buttery, caramel-drizzled bite!


