
Sweet & Tart Perfection: The Ultimate White Chocolate Raspberry Cookies 🍪🍓✨
Introduction: A Match Made in Dessert Heaven
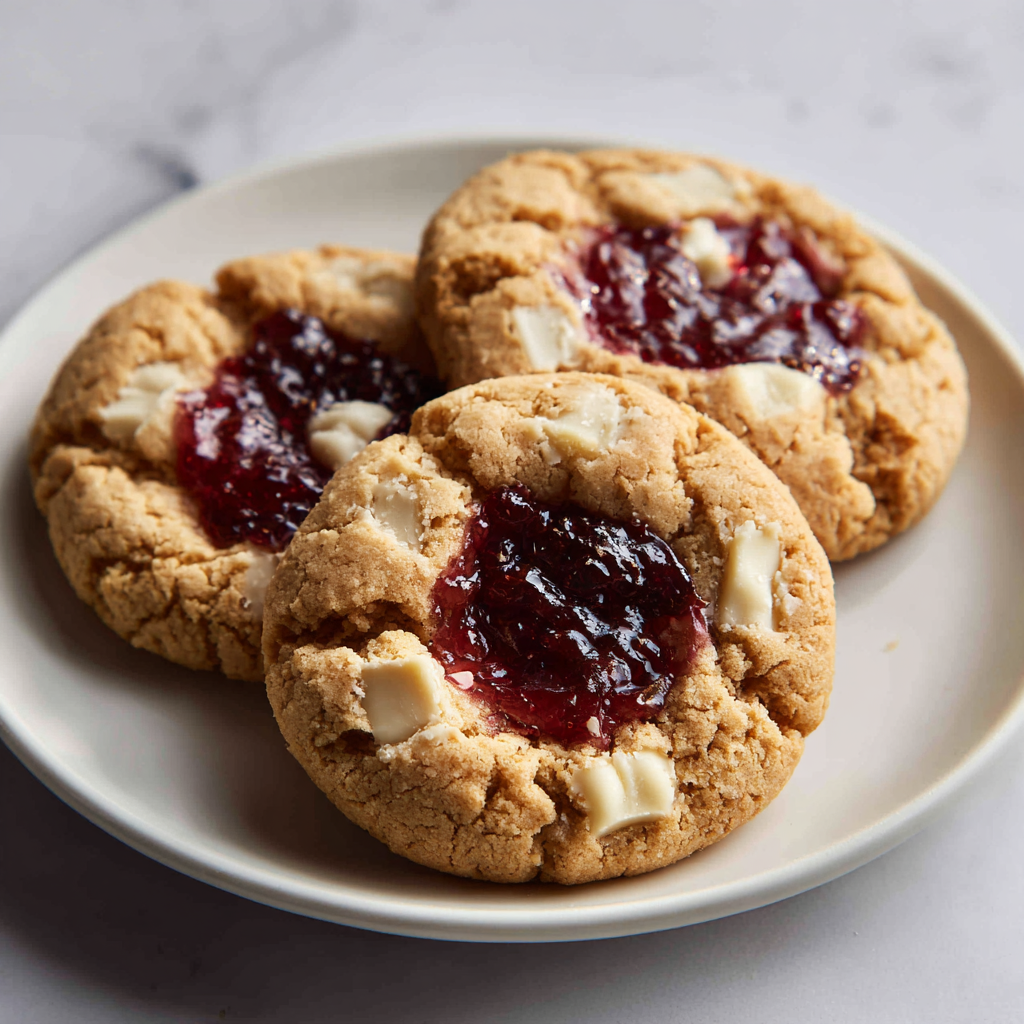
Welcome to the ultimate guide for baking one of the most delightful flavor combinations known to the pastry world: White Chocolate and Raspberry. If you have been searching for a cookie that perfectly balances the rich, creamy sweetness of premium white chocolate with the bright, tangy zest of fruit preserves, your search ends here. These White Chocolate Raspberry Cookies are not just a treat; they are an experience. Imagine sinking your teeth into a buttery, golden-brown edge that gives way to a soft, chewy center, punctuated by pockets of melted white chocolate and a heart of sweet-tart raspberry jam.
This recipe is designed to be the crown jewel of your cookie jar, perfect for holiday exchanges, Valentine’s Day gifts, or simply a Tuesday afternoon pick-me-up. Unlike standard chocolate chip cookies, these add a layer of sophistication and complexity through the addition of fruit. The vibrant red center makes them visually stunning, while the texture—somewhere between a classic drop cookie and a thumbprint cookie—offers the best of both worlds. In this comprehensive guide, we will walk you through every step, the science behind the ingredients, and the secrets to keeping that jam center perfectly poised. Get your mixer ready; we are about to bake something extraordinary.
Why This Flavor Profile Works
The magic of this cookie lies in the contrast. White chocolate, by its nature, is very sweet and rich, composed primarily of cocoa butter, sugar, and milk solids. It provides a creamy, velvety mouthfeel that is undeniably luxurious. However, on its own, it can sometimes be one-dimensional. Enter the raspberry. Raspberry preserves offer a sharp, acidic punch and a fruity floral note that cuts right through the richness of the white chocolate and the butter.
When these two elements meet in a cookie, they create a harmony of flavors. The buttery dough acts as the neutral canvas, grounding the extreme sweetness of the chocolate and the tartness of the jam. Furthermore, the textures complement each other beautifully. The chunks of chocolate provide a slight snap before melting, while the jam remains sticky and smooth, offering a different sensory experience in every bite. This isn’t just baking; it’s flavor engineering at its finest.
The Secret to the Perfect Cookie Texture
Achieving the perfect texture—crispy edges with a soft, almost under-baked center—requires a specific balance of ingredients. The use of both brown sugar and granulated white sugar is crucial. Brown sugar contains molasses, which adds moisture and acidity, reacting with the baking soda to create a soft, chewy interior. The white sugar, conversely, helps the dough spread just enough to create those crisp, caramelized edges that we all love.
Another secret weapon in this recipe is the use of an egg yolk in addition to a whole egg. The extra fat from the yolk enriches the dough, making it tender and fudgy rather than cakey. We also ensure not to over-mix the flour. Over-mixing develops gluten, which is great for bread but the enemy of a tender cookie. By folding the dry ingredients until just combined, we ensure the final product remains delicate and melt-in-your-mouth soft.
Ingredients
To create these masterpieces, you will need the following ingredients. Quality matters here, especially with the chocolate and the jam.
- 1/2 cup Unsalted Butter (softened to room temperature)
- 1/2 cup Light Brown Sugar (packed)
- 1/4 cup Granulated White Sugar
- 1 large Egg (room temperature)
- 1 tsp Vanilla Extract (pure is best)
- 1 1/2 cups All-Purpose Flour
- 1/2 tsp Baking Soda
- 1/4 tsp Salt
- 1/2 cup White Chocolate Chunks or Chips (high quality)
- 1/3 cup Raspberry Jam or Preserves (seedless preferred)
Instructions
- Preheat and Prep: Preheat your oven to 350°F (175°C). Line two large baking sheets with parchment paper or silicone baking mats. This prevents sticking and ensures even browning on the bottom of the cookies.
- Cream the Butter and Sugars: In a large mixing bowl or the bowl of a stand mixer fitted with the paddle attachment, beat the softened butter, brown sugar, and granulated sugar together on medium-high speed. You want to cream them for about 2-3 minutes until the mixture is pale, light, and fluffy. This step aerates the dough, which is essential for structure.
- Add Wet Ingredients: Add the egg and vanilla extract to the butter-sugar mixture. Beat on medium speed until fully combined and smooth, scraping down the sides of the bowl as needed to ensure everything is incorporated.
- Combine Dry Ingredients: In a separate medium bowl, whisk together the flour, baking soda, and salt. This ensures the leavening agent is evenly distributed throughout the flour.
- Mix the Dough: Turn the mixer to low speed and gradually add the dry ingredients to the wet ingredients. Mix only until streaks of flour have almost disappeared. Do not overmix!
- Fold in Chocolate: Remove the bowl from the mixer and use a rubber spatula to gently fold in the white chocolate chunks.
- Shape the Cookies: Scoop about 1.5 to 2 tablespoons of dough and roll into a ball. Place on the baking sheet, spacing them about 2 inches apart.
- Create the Indentation: Using your thumb or the back of a round teaspoon, gently press an indentation into the center of each dough ball. If the dough cracks slightly, you can gently smooth it back together with your fingers.
- Fill with Jam: Spoon about 1/2 to 1 teaspoon of raspberry jam into the indentation of each cookie. Be careful not to overfill, as the jam can bubble over during baking.
- Bake: Bake for 10-12 minutes, or until the edges are lightly golden brown and the centers look set but soft.
- Cool: Allow the cookies to cool on the baking sheet for 5-10 minutes. This allows them to set up so they don’t fall apart when moved. Transfer to a wire rack to cool completely.
Troubleshooting Common Issues
Even the best bakers encounter hiccups. Here are some tips to ensure your White Chocolate Raspberry Cookies come out perfect every time.
- Cookies Spreading Too Much: If your cookies turn into flat puddles, your butter was likely too warm. It should be soft enough to dent with a finger but not greasy or melting. If your kitchen is hot, chill the shaped dough balls in the fridge for 30 minutes before baking.
- Jam Leaking: If the jam runs off the cookie, you may have overfilled the indentation or made the well too shallow. Ensure you create a deep enough “nest” for the jam. Also, using a thicker preserve rather than a runny jelly helps.
- Hard Cookies: This usually comes from over-baking or adding too much flour. Measure your flour by spooning it into the cup and leveling it off, rather than scooping directly from the bag (which packs it down). Pull the cookies out when they still look slightly underdone in the middle; they will finish cooking on the hot pan.
Variations and Customizations
While the white chocolate and raspberry combo is iconic, this base dough is incredibly versatile. Here are a few ways to switch things up:
- Strawberry & Dark Chocolate: Swap the raspberry jam for strawberry preserves and the white chocolate for dark chocolate chunks for a “chocolate covered strawberry” vibe.
- Apricot & White Chocolate: Apricot jam offers a milder, sunnier tartness that pairs elegantly with white chocolate.
- Nutty Crunch: Add 1/4 cup of chopped macadamia nuts or pistachios to the dough for added texture and a savory note.
- Drizzle Finish: For a bakery-style finish, melt a little extra white chocolate and drizzle it over the cooled cookies.
Storage and Freezing Guidelines
These cookies are best enjoyed fresh, but they store surprisingly well.
- Room Temperature: Store in an airtight container at room temperature for up to 3 days. If stacking them, place a sheet of parchment paper between layers to prevent the sticky jam from adhering to the bottom of the cookie above it.
- Freezing Baked Cookies: You can freeze the baked cookies for up to 2 months. Place them in a single layer on a baking sheet to freeze solid, then transfer to a freezer bag. Thaw at room temperature.
- Freezing Dough: You can freeze the dough balls (without jam) for up to 3 months. When ready to bake, let them thaw slightly, make the indentation, fill with jam, and bake. You may need to add an extra minute to the baking time.
Conclusion
There is something undeniably comforting about a homemade cookie, and these White Chocolate Raspberry Cookies take that comfort to a new level of indulgence. They are a testament to the fact that simple ingredients, when treated with care and combined with creativity, can result in something truly spectacular. Whether you are baking for a festive holiday gathering, a summer picnic, or just a quiet night in with a good book, these cookies are sure to bring a smile to your face. The burst of tart raspberry against the sweet, creamy backdrop of white chocolate is a flavor journey you’ll want to take again and again. So, tie on that apron, preheat that oven, and get ready to fill your home with the irresistible aroma of buttery, fruity, chocolatey goodness. Happy baking!
White Chocolate Raspberry Cookies
Ingredients
Equipment
Method
- Preheat oven to 350°F (175°C). Line baking sheets with parchment paper.
- In a large bowl, cream together softened butter, brown sugar, and granulated sugar until light and fluffy (2-3 minutes).
- Beat in the egg and vanilla extract until smooth.
- In a separate bowl, whisk together flour, baking soda, and salt.
- Gradually add dry ingredients to wet ingredients, mixing on low speed until just combined.
- Fold in the white chocolate chunks by hand.
- Scoop dough into 1.5 tablespoon balls and place on baking sheet 2 inches apart.
- Press a thumb or spoon into the center of each ball to create a well. Fill each well with 1/2 teaspoon of raspberry jam.
- Bake for 10-12 minutes until edges are golden. Cool on pan for 5 minutes before transferring to wire rack.


