
✨ The Ultimate Stuffed Cookie Experience
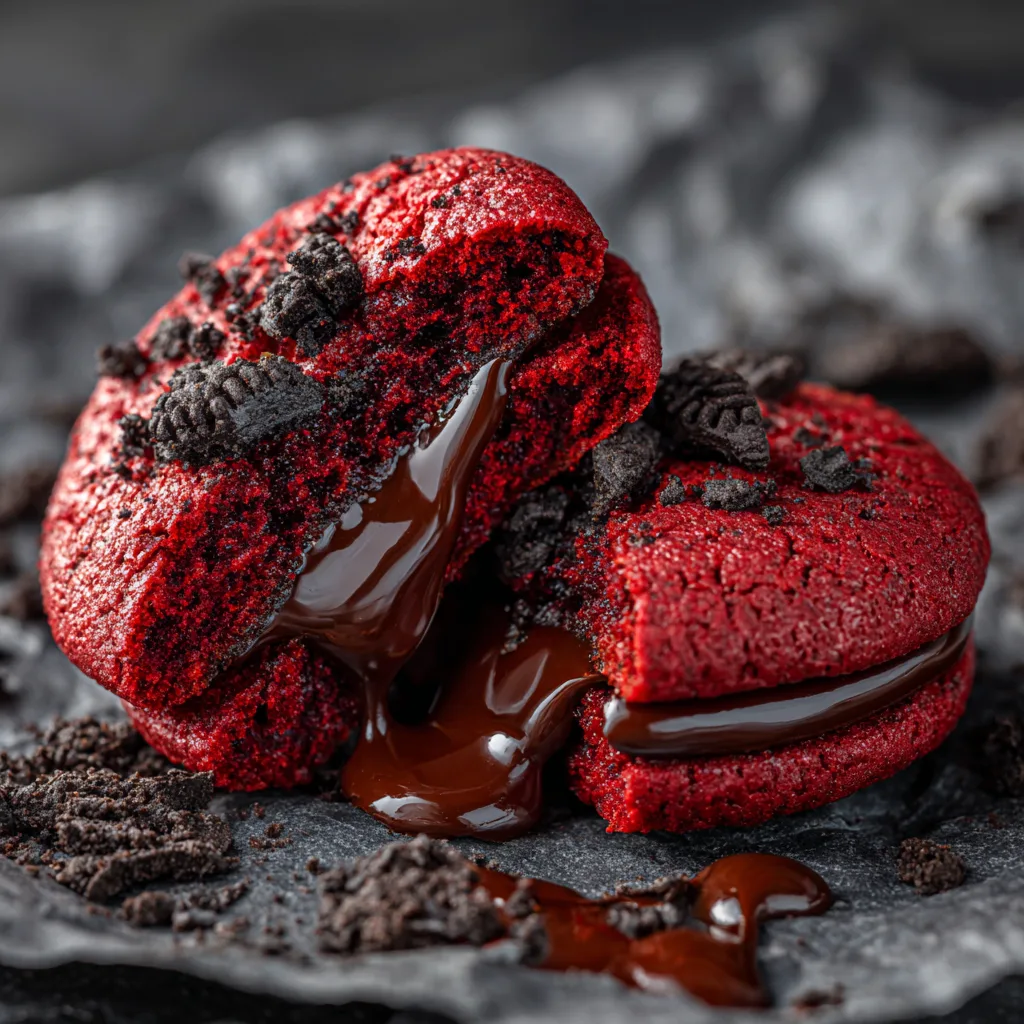
If you think a standard chocolate chip cookie is the peak of home baking, prepare to have your world turned completely upside down. These Red Velvet Stuffed Cookies are not just a dessert; they are an event. Imagine biting into a thick, incredibly soft, and chewy red velvet cookie, its vibrant color hinting at the subtle cocoa and vanilla notes within. As you break it apart, a literal river of warm, molten dark chocolate oozes from the center, creating a contrast of textures and flavors that is nothing short of pure bakery magic. Topped with the nostalgic crunch of crushed chocolate sandwich cookies, this recipe is a showstopper guaranteed to make you the most popular person in any room.
Stuffed cookies have taken the bakery world by storm, often commanding high prices at boutique dessert shops. However, the secret to achieving that coveted, perfectly gooey center at home is surprisingly simple. It requires no specialized equipment—just a little bit of preparation, some freezer space, and a true love for all things chocolate. Whether you are baking for Valentine’s Day, a holiday cookie exchange, or simply answering a formidable sweet tooth craving on a Friday night, these cookies deliver an unparalleled level of indulgence.
🍫 The Secret to the Perfect Molten Center
The biggest fear when making a stuffed cookie is that the filling will either bake directly into the dough and disappear, or leak out entirely, leaving you with a hollow, messy shell. The absolute key to a molten center that stays perfectly encapsulated and molten is temperature control.
Instead of trying to wrap dough around soft chocolate, we start by making a simple, thick dark chocolate ganache. We scoop this ganache into small, individual mounds and freeze them until they are rock solid. When you wrap your soft red velvet dough around these frozen chocolate truffles, they act as an internal temperature buffer. As the cookie bakes, the dough cooks and sets before the frozen center has a chance to completely melt and boil over. The result? A perfectly baked exterior with a center that has just reached that glorious, lava-like consistency the moment you pull them from the oven.
🍪 Nailing the Authentic Red Velvet Flavor
Red velvet is often misunderstood as simply chocolate cake with red food coloring, but true red velvet has a very specific flavor profile. It relies on a delicate balance: a hint of cocoa powder (but not so much that it becomes a full chocolate cookie), a generous splash of pure vanilla extract, and a touch of tanginess.
To achieve this in cookie form, we use a small amount of Dutch-processed cocoa powder. This provides that signature earthy note while keeping the dough light enough for the red food coloring to shine vibrantly. We also use a mix of both brown sugar and white granulated sugar; the molasses in the brown sugar contributes to a chewier texture and a deeper flavor. For the best, most striking color, use a high-quality gel food coloring rather than liquid drops. Gel coloring is much more concentrated, meaning you won’t throw off the liquid ratios of your dough trying to achieve that iconic, brilliant red hue.
🛒 Ingredients
For the Molten Chocolate Center:
- – 1 cup semi-sweet or dark chocolate chips
- – 1/4 cup heavy cream
For the Red Velvet Cookie Dough:
- – 2 and 1/2 cups all-purpose flour
- – 1/4 cup Dutch-processed cocoa powder
- – 1 teaspoon baking soda
- – 1/2 teaspoon kosher salt
- – 3/4 cup (1 and 1/2 sticks) unsalted butter, softened to room temperature
- – 3/4 cup packed light brown sugar
- – 1/2 cup granulated sugar
- – 1 large egg plus 1 egg yolk, room temperature
- – 1 tablespoon pure vanilla extract
- – 1 tablespoon red gel food coloring
- – 1 cup crushed chocolate sandwich cookies (like Oreos), divided
👩🍳 Instructions
- Prepare the Chocolate Centers: In a microwave-safe bowl, combine the chocolate chips and heavy cream. Microwave in 20-second bursts, stirring in between, until melted and smooth. Let the ganache cool slightly until it thickens into a scoopable consistency. Line a small plate with parchment paper and drop 12 equal-sized mounds (about 1 tablespoon each) of the ganache onto the paper. Freeze for at least 1 hour, or until completely solid.
- Whisk the Dry Ingredients: In a medium bowl, whisk together the all-purpose flour, cocoa powder, baking soda, and kosher salt. Set aside.
- Cream the Butter and Sugars: In the bowl of a stand mixer fitted with the paddle attachment (or using a hand mixer), beat the softened butter, brown sugar, and granulated sugar on medium-high speed for 2-3 minutes until light and fluffy.
- Add Wet Ingredients: Scrape down the sides of the bowl. Add the whole egg, egg yolk, and vanilla extract. Beat until fully combined. Slowly mix in the red gel food coloring until you achieve your desired vibrant red color.
- Incorporate Dry Ingredients: Turn the mixer to low speed and gradually add the dry ingredients. Mix until just combined. Do not overmix. Fold in half (1/2 cup) of the crushed chocolate sandwich cookies.
- Stuff the Cookies: Scoop a large portion of dough (about 3 tablespoons worth) and flatten it into a disc in the palm of your hand. Place one frozen chocolate ganache mound in the center. Carefully fold the edges of the dough up and over the chocolate, rolling it lightly to seal completely. Ensure no chocolate is exposed. Place the stuffed dough balls on a baking sheet lined with parchment paper.
- Chill the Dough: Chill the stuffed cookie dough balls in the refrigerator for 30 minutes. This prevents the cookies from spreading too flat in the oven. While chilling, preheat your oven to 350°F (175°C).
- Bake and Top: Bake the cookies for 11-13 minutes. They will look slightly underbaked in the center but set on the edges. Immediately upon removing from the oven, gently press the remaining crushed sandwich cookies onto the tops of the warm cookies.
- Cool and Serve: Let the cookies cool on the baking sheet for 10 minutes before transferring them to a wire rack. Serve warm for the ultimate gooey, molten chocolate experience!
💡 Pro-Tips for Bakery-Style Cookies
To guarantee success, always make sure your butter is at true room temperature—it should yield slightly to a gentle press but not be greasy or melted. If your butter is too warm, your cookies will spread excessively and lose their thick, bakery-style height.
When stuffing the dough, take an extra moment to thoroughly seal the bottom. Any cracks or thin spots in the dough are an escape route for your beautiful molten chocolate filling. Roll the ball smoothly between your hands until it is seamless. If the dough starts feeling too soft or sticky while you are assembling, pop it in the fridge for 10 minutes to firm up.
🥛 Serving and Storing
These cookies are an absolute dream when served warm, alongside a tall, ice-cold glass of milk to wash down the rich chocolate. If you want to take it over the top, serve a warm cookie in a bowl with a scoop of vanilla bean ice cream!
To store, keep them in an airtight container at room temperature for up to 4 days. The chocolate center will solidify as it cools. To recapture that fresh-from-the-oven, gooey lava center, simply pop a cookie in the microwave for 10-15 seconds before eating.
🎉 Conclusion: Love at First Bite
Baking these Stuffed Red Velvet Cookies is a labor of love that yields an incredibly high reward. They are visually stunning, texturally perfect, and absolutely packed with flavor. The thrill of breaking one open to reveal the warm, flowing chocolate center never gets old.
Don’t be intimidated by the stuffing process; once you see how easy it is to wrap dough around a frozen truffle, you’ll want to stuff every cookie you make! So grab your apron, get that chocolate freezing, and prepare to bake the most impressive, mouth-watering cookies of your life.
Red Velvet Cookies with Molten Chocolate Center
Ingredients
Equipment
Method
- Melt chocolate chips and heavy cream in the microwave in 20-second bursts until smooth. Let cool slightly, then scoop 12 mounds onto parchment paper. Freeze for 1 hour until solid.
- Whisk together the flour, cocoa powder, baking soda, and salt in a bowl.
- Beat the softened butter, brown sugar, and granulated sugar until light and fluffy (2-3 minutes).
- Mix in the egg, egg yolk, vanilla, and red gel food coloring until vibrant.
- Gradually add the dry ingredients to the wet dough, mixing until just combined. Fold in half of the crushed cookies.
- Flatten 3 tablespoons of dough, place a frozen chocolate mound in the center, and wrap the dough tightly around it, sealing completely.
- Chill the stuffed dough balls in the fridge for 30 minutes. Preheat oven to 350°F (175°C).
- Bake on a parchment-lined sheet for 11-13 minutes. Immediately press remaining crushed cookies onto the tops. Cool for 10 minutes before serving.


