There are few things in this world quite as universally beloved, comforting, and utterly indulgent as a perfect chocolate brownie. But what makes a brownie “perfect”? For some, it is a light, airy, cake-like square that pairs beautifully with a cup of afternoon tea. For others—and if you are reading this, likely for you—perfection comes in the form of a dense, intensely chocolatey, almost truffle-like square of pure fudge. Welcome to the ultimate guide to creating the fudgiest, most decadent chocolate brownies you will ever bake.
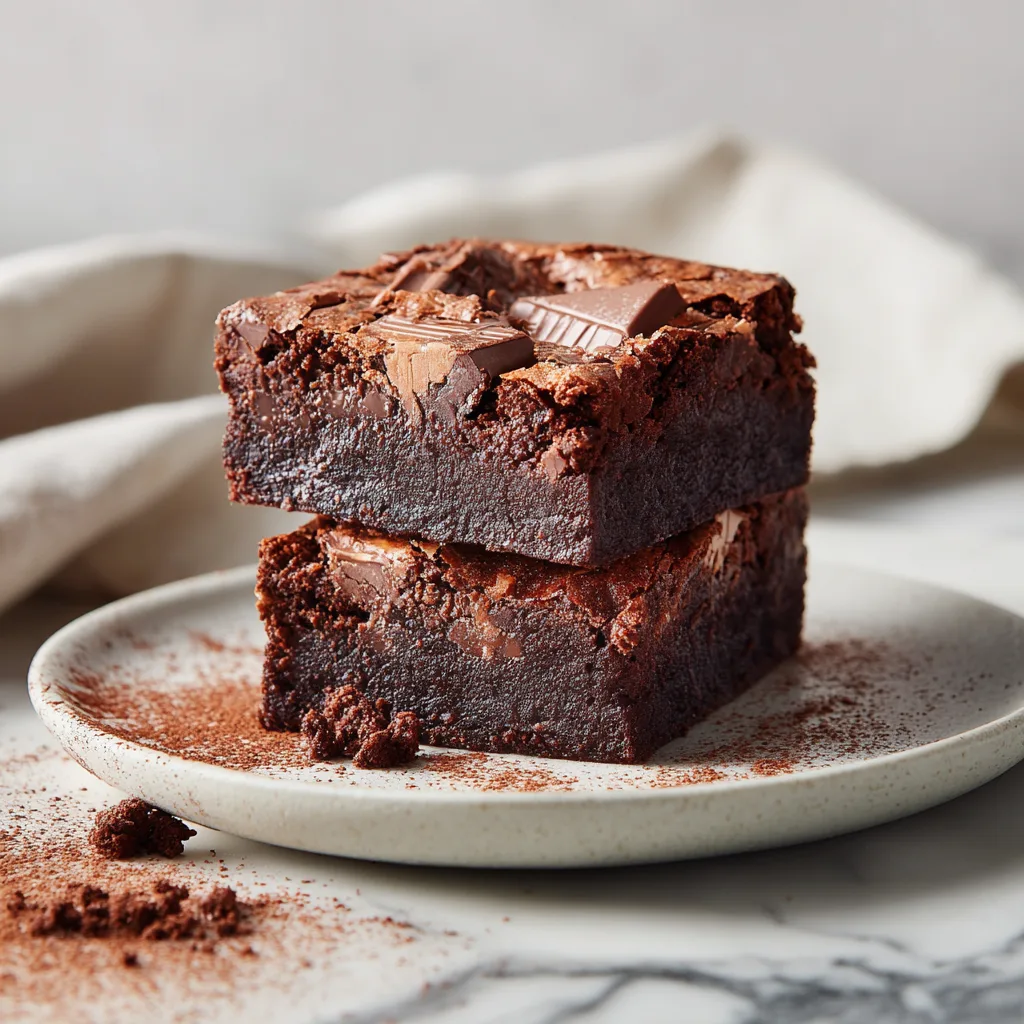
These Ultimate Fudgy Chocolate Brownies are not for the faint of heart. They are rich, deeply flavorful, and boast that highly coveted paper-thin, glossy, crinkly top that shatters delicately when you bite into it. Beneath that delicate crust lies a center so moist and chewy that it practically melts in your mouth, studded with generous chunks of semi-sweet chocolate that provide delightful pockets of gooey goodness.
Baking the perfect brownie from scratch is a rite of passage for any home baker. While boxed mixes have their time and place, there is a profound satisfaction in melting high-quality butter and premium chocolate together, whisking eggs until they are a pale ribbon of promise, and folding the batter together until it is thick and glossy. Let’s explore the science, the technique, and the pure joy of baking the ultimate fudgy brownie from scratch.
The Anatomy of a Perfect Fudgy Brownie
To master the fudgy brownie, we must first understand the structural differences between fudgy, chewy, and cakey brownies. The secret lies in the fat-to-flour ratio.
Cakey brownies rely on a higher ratio of flour and often include chemical leaveners like baking powder or baking soda to give them lift and a crumb similar to chocolate cake. Chewy brownies often use a combination of butter and oil, plus a higher ratio of brown sugar to white sugar, which brings moisture and a distinct chewiness due to the molasses content.
Fudgy brownies, like the ones we are making today, have a very high fat-to-flour ratio. We use a generous amount of butter and melted chocolate, which act as the primary structural components alongside the eggs. By keeping the flour to an absolute minimum and omitting chemical leaveners entirely, we ensure that the brownie remains incredibly dense. The result is a texture that bridges the gap between a traditional baked good and a piece of soft fudge.
Cocoa Powder vs. Melted Chocolate: The Best of Both Worlds
When developing a brownie recipe, one of the biggest debates is whether to use cocoa powder or melted chocolate.
Cocoa Powder: Brownies made exclusively with cocoa powder tend to have a very pronounced, straightforward chocolate flavor. Cocoa powder is pure cocoa solids without the cocoa butter, meaning it delivers an intense punch. However, because it lacks fat, cocoa brownies can sometimes lean towards the drier side if not balanced perfectly with additional butter or oil.
Melted Chocolate: Brownies made with melted chocolate are unparalleled in their fudgy, rich texture. The cocoa butter in the melted chocolate solidifies as the brownies cool, giving them that signature dense, truffle-like bite. However, the chocolate flavor can sometimes be slightly muted compared to a cocoa brownie.
The Solution: We use both. By combining high-quality melted dark chocolate with a scoop of Dutch-processed cocoa powder, we achieve the ultimate textural density from the cocoa butter while reinforcing the deep, complex chocolate flavor with the cocoa solids. It is the golden ratio for the ultimate chocolate lover.
The Secret to the Perfect Crinkly Top
The hallmark of a truly superior brownie is the glossy, crinkly, paper-thin top crust. This delicate layer is actually a very thin meringue that forms on the surface of the batter during baking. How do we ensure this meringue forms every single time?
The secret is in the eggs and the sugar. To achieve the crinkly top, you must vigorously whisk the eggs and the granulated sugar together before adding any other ingredients. You want to beat them for several minutes until the mixture becomes pale, significantly increases in volume, and forms a thick “ribbon” when the whisk is lifted.
This process dissolves the sugar crystals into the egg whites and aerates the mixture. When baked, this aerated sugar-egg mixture rises to the surface, dries out, and forms that beautiful, shattering crust. If you skip this step and just briefly stir your eggs and sugar together, your brownies will taste fine, but they will have a dull, matte finish.
Equipment You Will Need
You do not need an arsenal of professional pastry equipment to make these brownies, but a few key items will ensure success:
- 8×8-inch Baking Pan: A light-colored metal pan is best. Glass or ceramic pans conduct heat differently and can lead to overbaked edges and underbaked centers.
- Parchment Paper: Crucial for lifting the brownies out of the pan cleanly. Do not skip this!
- Double Boiler or Microwave-Safe Bowl: For gently melting the butter and chocolate together without scorching.
- Whisk and Silicone Spatula: A whisk for aerating the eggs and sugar, and a flexible spatula for gently folding in the dry ingredients.
- Stand Mixer or Hand Mixer (Optional but helpful): While you can achieve the ribbon stage by hand, an electric mixer makes beating the eggs and sugar much faster and easier on your arm.
Ingredients
- 1/2 cup (115g) unsalted butter, cut into cubes
- 8 oz (225g) high-quality semi-sweet or bittersweet chocolate (60-70% cacao), roughly chopped
- 1 cup (200g) granulated sugar
- 1/2 cup (100g) lightly packed light brown sugar
- 3 large eggs, at room temperature
- 1 teaspoon pure vanilla extract
- 1/2 cup (65g) all-purpose flour, spooned and leveled
- 1/4 cup (25g) Dutch-processed cocoa powder
- 1/2 teaspoon kosher salt
- 3 oz (85g) semi-sweet chocolate chunks or chips (for folding into the batter and topping)
Step-by-Step Instructions
- Preheat and Prep: Preheat your oven to 350°F (175°C). Line an 8×8-inch metal baking pan with parchment paper, leaving an overhang on two sides so you can easily lift the baked brownies out later. Lightly grease the parchment and exposed pan sides with non-stick spray or a little butter.
- Melt the Chocolate Base: Place the cubed butter and the 8 oz of chopped chocolate into a heatproof bowl. You can melt this over a double boiler (a pot of simmering water) or in the microwave in 30-second bursts, stirring well between each burst until completely smooth and glossy. Set aside to cool slightly.
- Whip the Eggs and Sugar: In a large mixing bowl (or the bowl of a stand mixer), combine the eggs, granulated sugar, and brown sugar. Beat vigorously on medium-high speed for 3 to 5 minutes. The mixture should become very pale, thick, and fluffy. When you lift the whisk, the batter should fall in a ribbon that sits on the surface for a few seconds before dissolving.
- Combine Wet Ingredients: Pour the slightly cooled melted chocolate and butter mixture into the whipped eggs and sugar. Add the vanilla extract. Gently fold the mixtures together using a silicone spatula until just combined. Do not overmix and deflate the eggs.
- Add Dry Ingredients: Sift the all-purpose flour, Dutch-processed cocoa powder, and kosher salt directly over the wet batter. Using your spatula, gently fold the dry ingredients in. Stop folding when you can still see just a few streaks of flour remaining.
- Fold in the Chunks: Add about 2/3 of your extra chocolate chunks into the batter and give it two or three final folds to distribute them.
- Pour and Top: Pour the thick brownie batter into your prepared pan, smoothing the top with your spatula. Sprinkle the remaining chocolate chunks evenly across the top of the batter.
- Bake: Bake on the center rack for 30 to 35 minutes. To test for doneness, insert a toothpick into the center. It should not come out clean. It should come out with moist, fudgy crumbs attached (but not raw, wet batter). If it comes out totally clean, the brownies are overbaked.
- Cool Completely: This is the hardest step! Let the brownies cool completely in the pan on a wire rack for at least 2 hours. As they cool, the fats solidify, creating that dense, fudgy texture. If you cut them while hot, they will fall apart.
- Slice and Serve: Once completely cool, use the parchment overhang to lift the brownies out of the pan. Place on a cutting board and cut into squares using a large, sharp knife. For the cleanest cuts, wipe the knife blade with a warm, damp paper towel between each slice.
Ultimate Fudgy Chocolate Brownies
Ingredients
Equipment
Method
- Preheat oven to 350°F (175°C). Line an 8×8-inch metal baking pan with parchment paper, leaving an overhang on the sides.
- In a heatproof bowl, melt the butter and chopped chocolate together over a double boiler or in the microwave in 30-second bursts. Stir until smooth and set aside to cool slightly.
- In a large bowl, aggressively whisk the eggs, granulated sugar, and brown sugar together for 3 to 5 minutes until pale, thick, and ribbon-like.
- Gently fold the slightly cooled melted chocolate and butter mixture into the whipped eggs and sugar. Stir in the vanilla extract.
- Sift the flour, cocoa powder, and salt over the wet batter. Gently fold with a spatula until just combined. Do not overmix.
- Fold in 2/3 of the chocolate chunks.
- Pour the batter into the prepared pan, smooth the top, and sprinkle with the remaining chocolate chunks.
- Bake for 30 to 35 minutes. A toothpick inserted into the center should come out with moist, fudgy crumbs attached, not wet batter and not completely clean.
- Allow the brownies to cool completely in the pan on a wire rack for at least 2 hours before using the parchment overhang to lift, slice, and serve.
Notes
Pro Tips for Brownie Success
Even with a perfect recipe, baking is a science. Here are a few professional tips to ensure your brownies turn out spectacularly every single time:
- Room Temperature Eggs: Cold eggs will shock the melted chocolate and butter, causing the batter to seize up and become granular. Always ensure your eggs are at room temperature. If you forgot to take them out of the fridge, place them in a bowl of warm (not hot) water for 10 minutes before using.
- Quality Chocolate Matters: Because chocolate is the main flavor profile here, do not use cheap chocolate chips for the melted base. Chocolate chips contain stabilizers that prevent them from melting smoothly. Buy high-quality baking bars (like Lindt, Ghirardelli, or Guittard) and chop them yourself.
- Do Not Overmix the Flour: Gluten development is the enemy of a fudgy brownie. Once you add the flour, fold it in with a gentle hand and stop the very moment the last streak of white disappears. Overmixing will result in tough, bread-like brownies.
- Trust the Toothpick: Fudgy brownies are technically slightly underbaked compared to cakes. Do not wait for a clean toothpick. Look for moist crumbs. Remember that the brownies will continue to cook slightly from the residual heat of the pan once removed from the oven.
Delicious Variations and Mix-ins
Once you master this base recipe, it becomes a blank canvas for your culinary creativity. Here are a few ways to customize your batch:
- Salted Caramel Swirl: Before baking, dollop 1/3 cup of thick, room-temperature salted caramel sauce over the batter in the pan. Use a butter knife to swirl it through. Top with flaky sea salt before baking.
- Nutty Brownies: Fold in 3/4 cup of toasted, roughly chopped walnuts or pecans along with the chocolate chunks for a classic crunch.
- Espresso Enhancement: Add 1 tablespoon of instant espresso powder to the flour and cocoa mixture. Coffee deeply enhances the flavor of chocolate without making the brownies taste like coffee.
- Peanut Butter Swirl: Warm 1/3 cup of creamy peanut butter in the microwave for 15 seconds until it is easily pourable. Swirl it into the top of the batter before baking for a classic flavor combination.
Serving Suggestions
These brownies are incredibly rich and stand perfectly on their own, perhaps with a cold glass of milk or a hot cup of black coffee to balance the sweetness. However, if you want to elevate them to a plated restaurant-style dessert, try the following:
Warm a brownie square in the microwave for 10–15 seconds just until the chocolate chunks get gooey again. Place it on a plate, top with a generous scoop of high-quality vanilla bean ice cream, and drizzle with hot fudge or salted caramel sauce. The contrast of the warm, dense brownie and the cold, melting ice cream is a sensory delight.
Alternatively, for an elegant presentation, serve a room-temperature brownie lightly dusted with powdered sugar or extra cocoa powder, accompanied by fresh raspberries and a dollop of unsweetened whipped cream. The tartness of the berries cuts through the deep chocolate richness perfectly.
Storage and Freezing Instructions
Proper storage is essential to maintain that glorious fudgy texture.
Room Temperature: Store baked, cooled brownies in an airtight container at room temperature for up to 4 days. Keeping air away from them prevents them from drying out. You can also leave them in the baking pan, tightly covered with plastic wrap or aluminum foil.
Refrigerator: Some people prefer cold brownies because chilling them makes them even denser and chewier. You can store them in an airtight container in the fridge for up to a week. Let them sit at room temperature for 15 minutes before eating for the best flavor, or eat them straight from the fridge if you love a seriously chewy bite.
Freezing: Brownies freeze exceptionally well! To freeze, do not cut the whole slab into squares. Wrap the entire cooled block of brownies tightly in a layer of plastic wrap, followed by a layer of aluminum foil. Freeze for up to 3 months. When ready to eat, thaw the block overnight in the refrigerator or at room temperature for a few hours before slicing. You can also freeze individual slices by wrapping them tightly in plastic wrap and placing them in a zip-top freezer bag for quick, single-serve treats.