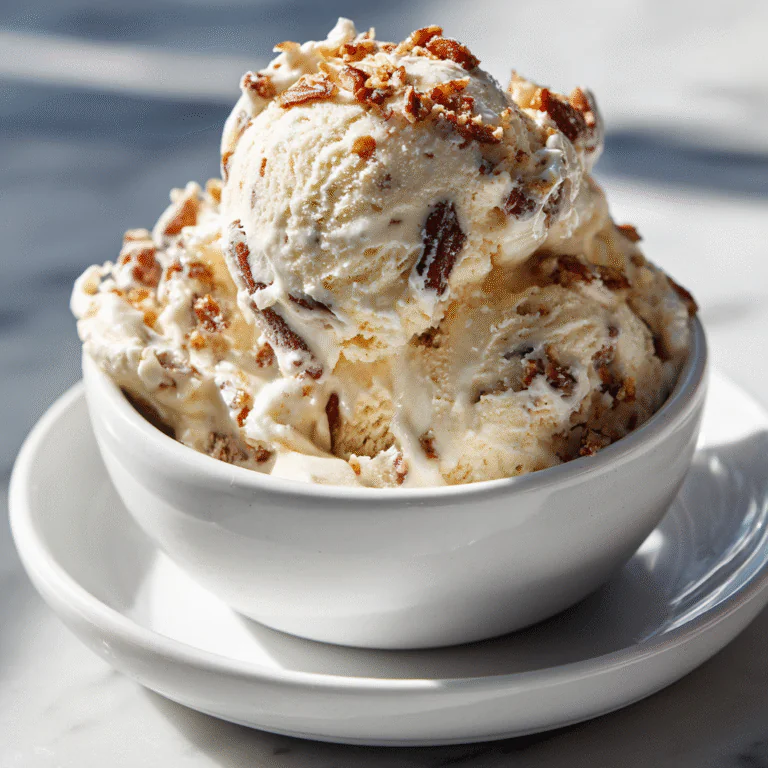
When it comes to desserts that offer maximum visual impact with minimal kitchen stress, layered dessert cups are truly in a league of their own. And when you introduce the warm, caramelized, deeply spiced magic of Biscoff cookie butter into the mix? You have a guaranteed crowd-pleaser that will have your friends and family begging for the recipe. These Ultimate No-Bake Biscoff Cookie Butter Cheesecake Cups are the epitome of indulgent, effortless elegance. Featuring a buttery, crunchy speculoos cookie crust, a cloud-like, tangy vanilla cheesecake mousse center, and a rich, glossy layer of melted cookie butter on top, every single spoonful is an absolute dream.
In this comprehensive, deep-dive guide, we are going to explore everything you could possibly need to know to master these spectacular individual desserts. From understanding the fascinating European history behind the beloved speculoos cookie, to the specific techniques required to whip your cream cheese into a flawlessly airy mousse, we are leaving no stone unturned. Whether you are hosting an elegant dinner party, preparing for a festive holiday gathering, or simply want to treat yourself to a luxurious weekend sweet, these no-bake cups are the perfect solution. So, grab your favorite dessert glasses and let’s embark on a journey of sweet, creamy, caramelized perfection!
Why You Will Obsess Over These Layered Desserts ✨
There is a multitude of reasons why this specific recipe is destined to become a permanent fixture in your culinary repertoire. First and foremost is the sheer convenience of the “no-bake” method. Turning on the oven can often feel like a chore, especially during warmer months or when you are already utilizing your oven space for a large dinner spread. This recipe eliminates that hassle completely. Everything comes together using just a mixing bowl, a microwave, and your refrigerator. It is the ultimate low-stress dessert.
Secondly, the individual portioning of dessert cups (often called verrines in French pastry terms) offers a touch of sophistication that a standard slice of cake or pie simply cannot match. Serving desserts in clear glasses not only showcases the beautiful, distinct layers of your creation but also makes serving a breeze. There is no messy slicing, no crumbling crusts to worry about, and no fighting over who gets the biggest piece. Everyone gets their own perfect, identical serving.
Finally, the flavor profile is incredibly balanced. Cookie butter is notoriously sweet and rich. If you were to eat a whole bowl of it, it might be overwhelming. However, by pairing it with a tangy, slightly savory cream cheese filling, that intense sweetness is perfectly tempered. The crunchy texture of the crust contrasts beautifully with the silky smoothness of the filling and the gooey richness of the topping. It is a masterpiece of taste and texture in every bite.
The Magic of Speculoos and Cookie Butter 🍪
To truly appreciate this dessert, one must understand its star ingredient: the speculoos cookie. Originating in Belgium and the Netherlands, speculoos (or speculaas) are traditional shortcrust biscuits heavily spiced with cinnamon, nutmeg, cloves, ginger, and cardamom. Historically, they were baked to celebrate St. Nicholas’ Day in December. They are famous for their deep caramel flavor, achieved through the use of Belgian brown sugar, and their incredibly satisfying, snappy crunch.
The invention of “cookie butter” (popularized globally by the brand Lotus Biscoff) revolutionized how we consume these beloved biscuits. By crushing the cookies and blending them with oils and sugar, culinary innovators created a spreadable paste that possesses all the magical, spiced caramel flavor of the cookie but with the texture of smooth peanut butter. This spread is the secret weapon in our dessert cups. It acts as both a flavoring agent for the cheesecake filling (if you choose to mix a little in) and as the crowning, glossy jewel poured over the top of the set mousse.
Essential Equipment for Perfect Dessert Cups 🥄
While this recipe is incredibly forgiving and accessible to bakers of all skill levels, having the right tools on hand will make the assembly process much smoother and yield a more professional-looking result. Here is a breakdown of the equipment you should gather before beginning:
Clear Glasses or Jars: This is arguably the most important element for presentation. Small tumblers, stemless wine glasses, traditional dessert verrines, or even small, wide-mouth mason jars work beautifully. You want something transparent so the layers are visible, with a capacity of about 6 to 8 ounces.
Electric Hand Mixer or Stand Mixer: Achieving the perfect, cloud-like texture for the cheesecake filling requires aerating the cream cheese and heavy cream. An electric mixer will do this quickly and efficiently, ensuring there are no lumps.
Food Processor (Optional but Helpful): To get a perfectly even, sandy texture for your cookie crust, a food processor is ideal. If you don’t have one, simply placing the cookies in a heavy-duty zip-top bag and crushing them with a rolling pin works perfectly fine, though the crumbs might be slightly more rustic.
Piping Bag (Optional): If you want incredibly clean, distinct lines between your crust and your cheesecake layer, transferring your filling to a piping bag (or a large zip-top bag with the corner snipped off) is a game-changer. Spooning the mixture in works too, but piping prevents the filling from smearing against the sides of the glass.

Ingredients – Your Blueprint for Sweet Success 📝
The beauty of this dessert lies in its short, accessible ingredient list. When a recipe has so few components, the quality of each ingredient matters immensely. Here is exactly what you need to create these irresistible cups:
- – 20 Lotus Biscoff cookies (or similar spiced speculoos cookies), plus extra for garnish
- – 4 tablespoons unsalted butter, melted
- – 8 ounces (1 block) full-fat cream cheese, softened to room temperature
- – 1/2 cup powdered sugar (confectioners’ sugar), sifted
- – 1 teaspoon pure vanilla extract
- – 1 cup heavy whipping cream, cold
- – 1/2 cup smooth Biscoff cookie butter spread (plus 2 extra tablespoons for the filling, optional)
Instructions – Step-by-Step Layering Guide 🧑🍳
Creating these layered masterpieces is a simple process, but paying attention to the details—like the temperature of your ingredients—will ensure absolute perfection. Follow these steps closely for dessert cup success:
- Prepare the Cookie Crust: Place the 20 Biscoff cookies into a food processor and pulse until they form fine crumbs. Alternatively, crush them finely in a sealed bag using a rolling pin. Transfer the crumbs to a medium mixing bowl.
- Bind the Crust: Pour the melted unsalted butter over the cookie crumbs. Use a fork to toss the mixture until all the crumbs are evenly moistened and resemble wet sand.
- Form the Base Layer: Divide the crumb mixture evenly among your serving glasses (usually 4 to 6 glasses, depending on size). Use the back of a spoon or the bottom of a smaller glass to gently press the crumbs down into an even, compact layer. Place the glasses in the refrigerator to chill while you make the filling.
- Whip the Heavy Cream: In a clean, cold bowl, use an electric mixer to whip the cold heavy cream until stiff peaks form. Be careful not to over-whip, or it will turn into butter. Set the whipped cream aside.
- Beat the Cream Cheese: In a separate large bowl, beat the softened cream cheese, powdered sugar, and vanilla extract together until completely smooth, creamy, and free of any lumps. (If you want a stronger cookie butter flavor throughout, beat in 2 tablespoons of the cookie butter spread during this step).
- Fold to Combine: Gently fold the whipped cream into the cream cheese mixture using a rubber spatula. Use a sweeping, folding motion rather than stirring, to keep the mixture as light and airy as possible.
- Add the Cheesecake Layer: Remove the glasses from the fridge. Spoon or pipe the cheesecake filling evenly over the chilled cookie crusts, filling the glasses leaving about an inch of space at the top. Smooth the tops with the back of a spoon. Return to the fridge for at least 1 hour to set.
- Create the Top Layer: Place the 1/2 cup of smooth cookie butter into a microwave-safe bowl. Microwave in short 15-second bursts, stirring in between, until it is melted, warm, and easily pourable.
- Pour and Chill: Carefully pour a layer of the melted cookie butter over the set cheesecake filling in each glass. Gently tilt the glasses to ensure the cookie butter covers the entire surface evenly. Place the cups back in the refrigerator for at least another hour to allow the top layer to set completely.
- Garnish and Serve: Just before serving, garnish each dessert cup with a whole Biscoff cookie pressed gently into the top, and sprinkle with a few extra cookie crumbs. Serve chilled and enjoy the decadent layers!
No-Bake Biscoff Cookie Butter Cheesecake Cups
Ingredients
Equipment
Method
- Crush the Biscoff cookies into fine crumbs. Mix with melted butter until it resembles wet sand.
- Press the crumb mixture evenly into the bottom of 4 to 6 clear dessert glasses. Chill in the refrigerator.
- In a cold bowl, whip the heavy cream until stiff peaks form. Set aside.
- In a separate bowl, beat the softened cream cheese, powdered sugar, and vanilla extract until completely smooth and creamy.
- Gently fold the whipped cream into the cream cheese mixture until just combined.
- Spoon or pipe the cheesecake filling over the chilled cookie crusts, leaving space at the top. Chill for 1 hour.
- Melt the cookie butter in the microwave in 15-second intervals until smooth and pourable.
- Pour the melted cookie butter evenly over the set cheesecake layers. Chill for at least 1 more hour before garnishing with a whole cookie and serving.
Notes
Expert Tips for Flawless Presentation 🎨
While the taste is paramount, the appeal of a layered dessert cup is highly visual. To ensure your cups look like they came straight from a high-end bakery, follow these expert styling tips.
First, always wipe the inside rims of your glasses. When spooning in the cookie crumbs or the cheesecake filling, it is easy to accidentally smudge the glass. Keep a slightly damp paper towel handy and carefully wipe away any stray smudges before adding the next layer. This guarantees sharp, distinct lines between the brown, cream, and amber layers.
Second, ensure your cream cheese is truly at room temperature before you begin mixing. If the cream cheese is even slightly cold, it will form tiny lumps when mixed with the sugar, ruining the silky texture of your mousse. Leave it on the counter for at least two hours before baking. Conversely, your heavy cream must be very cold to whip properly.
Creative Variations and Flavor Twists 🔄
Once you have mastered the basic recipe, these no-bake cups are incredibly fun to customize. If you want to cut the sweetness of the cookie butter, try adding a layer of tart fruit. A spoonful of fresh raspberry coulis or a layer of thinly sliced bananas sandwiched between the crust and the cheesecake filling pairs beautifully with the caramelized notes of the speculoos.
For the chocolate lovers, a chocolate-Biscoff variation is divine. You can substitute half of the Biscoff cookies in the crust with crushed chocolate graham crackers or Oreos. Additionally, you could drizzle a layer of dark chocolate ganache over the top of the melted cookie butter before chilling.
If you cannot find Biscoff or speculoos cookies, this exact recipe template works beautifully with other ingredients. You can use graham crackers and peanut butter, or crushed vanilla wafers with a lemon curd topping. The “crust, creamy no-bake filling, rich topping” ratio is a foolproof formula for dessert success.
Make-Ahead and Storage Strategies 🧊
One of the greatest advantages of this recipe is that it is a fantastic make-ahead dessert. In fact, these cups actually taste better the next day, as the chilling time allows the flavors to meld together and the cheesecake mousse to develop a firmer, more satisfying texture.
You can fully assemble these dessert cups up to 48 hours in advance of your event. Simply wrap the top of each glass tightly with plastic wrap to prevent the dessert from absorbing any savory odors from your refrigerator. Wait to add the final garnish (the whole cookie and the crumbs) until right before serving, as the moisture from the fridge will cause the garnish cookies to become soft and lose their signature snap.
Leftovers will keep well in the refrigerator for up to 4 days, making them a great meal-prep option for satisfying your sweet tooth throughout the week. Because of the heavy cream and cream cheese, freezing is not recommended, as the dairy can separate and become grainy upon thawing.
Conclusion: A Spoonful of Cookie Butter Heaven 🥄
The No-Bake Biscoff Cookie Butter Cheesecake Cup is a testament to the fact that you do not need complex pastry skills or hours of oven time to create a truly show-stopping dessert. By combining the beloved, spiced crunch of speculoos cookies with a rich, tangy, cloud-like cream cheese filling and a decadent melted cookie butter topping, you create an irresistible treat that appeals to adults and children alike.
Whether you are presenting them on a silver platter at a fancy dinner party or enjoying one in your pajamas on the couch, the beautiful layers and incredible textures make every bite feel like a special occasion. Take your time pressing that crust, whipping that cream to perfection, and pouring that glorious golden cookie butter. Your patience will be rewarded with a dessert that is nothing short of extraordinary. Enjoy every creamy, crunchy, caramelized spoonful!