1. Welcome to Your New Favorite Spring Tradition
Spring is a time of renewal, bright colors, and of course, spectacular desserts! If you are looking for a show-stopping centerpiece for your seasonal table, this Easter Mini Egg Chocolate Swiss Roll is an absolute dream. Visually, it is stunning: a delicate, deep-brown chocolate sponge cake hugs a massive, cloud-like swirl of vibrant pastel-blue cream. Topped with delicate chocolate shavings and iconic speckled candy eggs, it looks like a beautiful little bird’s nest that has been kissed by spring magic.
But this cake isn’t just about looks. The combination of the airy, light chocolate sponge with the rich, vanilla-scented whipped cream is a match made in culinary heaven. Many home bakers are intimidated by the idea of making a Swiss roll, fearing the dreaded “crack” in the sponge. However, with the detailed techniques and tips outlined in this guide, you will master the art of the rolled cake. Whether you are hosting a large holiday gathering or simply want a fun weekend baking project with the kids, this recipe will bring joy, color, and incredible flavor to your kitchen.
2. The Secret to a Perfectly Crack-Free Sponge Cake
The foundation of any great Swiss roll is the sponge cake, known technically as a génoise or a classic fatless sponge. Unlike heavier layer cakes that rely on butter and baking powder for their structure, a true roll cake gets its volume entirely from whipped eggs. This creates a cake that is incredibly light, flexible, and spongy—exactly what you need when you are going to bend it into a spiral.
The secret to keeping it flexible lies in the moisture and the rolling technique. You must bake the cake just until it springs back when lightly touched; overbaking will dry it out and guarantee a crack. Furthermore, the cake must be rolled while it is still piping hot straight from the oven. By rolling it in a powdered-sugar-dusted towel while warm, the cake “memorizes” its rolled shape as it cools. When you unroll it later to add your beautiful blue filling, it will naturally want to curve back onto itself, wrapping around the cream flawlessly.
Ingredients
Gather these high-quality ingredients to ensure the best flavor and texture for your spring dessert:
- – 4 large eggs, room temperature
- – 1/2 cup granulated sugar
- – 1/4 cup unsweetened cocoa powder (Dutch-processed preferred)
- – 1/3 cup all-purpose flour
- – 1 teaspoon pure vanilla extract
- – 1/4 teaspoon salt
- – 2 tablespoons powdered sugar (for dusting the rolling towel)
- – 1 1/2 cups heavy whipping cream, cold
- – 1/2 cup powdered sugar (for the filling)
- – 1 teaspoon vanilla extract (for the filling)
- – 2-3 drops sky blue gel food coloring
- – 1/2 cup crushed and whole speckled chocolate mini eggs
- – 2 tablespoons dark chocolate shavings
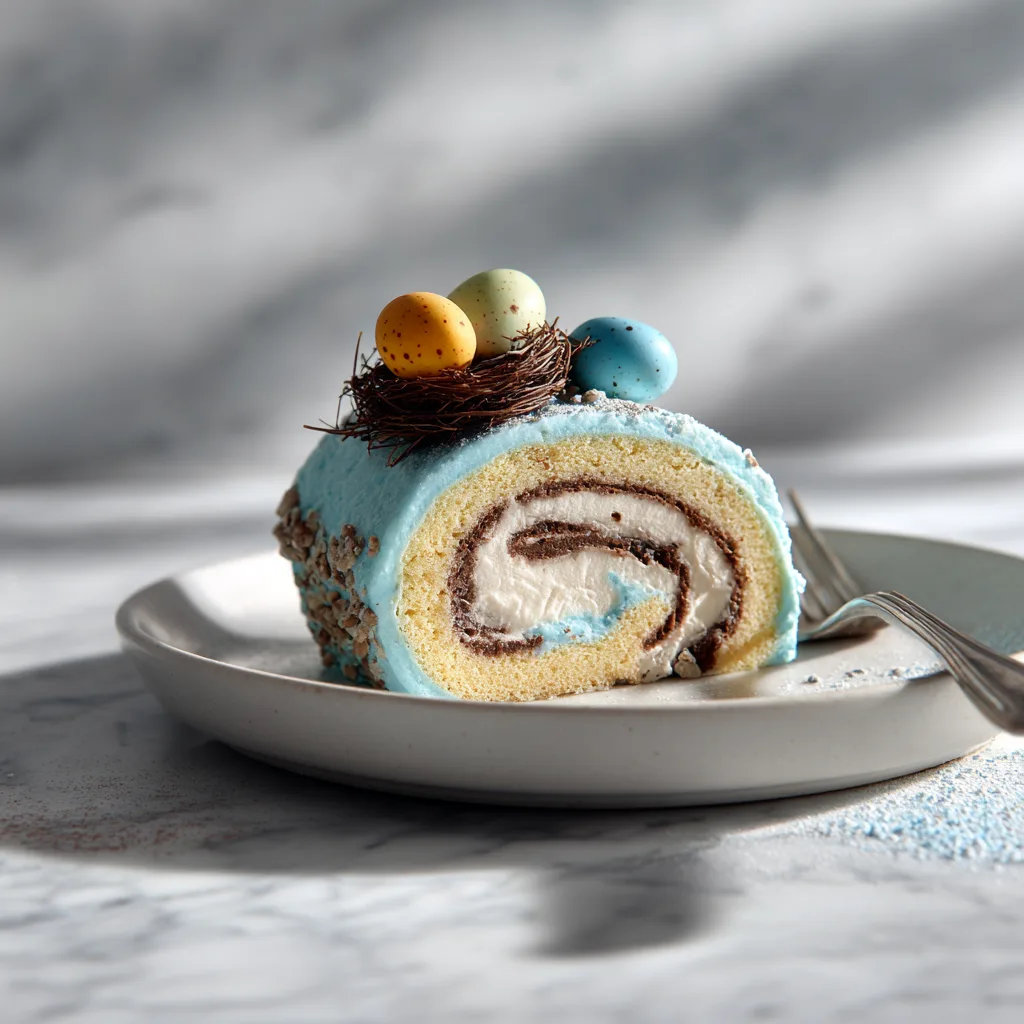
Instructions
Follow these steps carefully, and don’t rush the cooling process!
- Preheat your oven to 350°F (175°C). Line a 10×15-inch jelly roll pan with parchment paper, leaving a slight overhang on the edges, and lightly grease the parchment.
- In a large mixing bowl, beat the eggs and granulated sugar on high speed using an electric mixer for about 5 to 7 minutes. The mixture should become pale, thick, and triple in volume (the “ribbon stage”). Gently beat in the 1 teaspoon of vanilla extract.
- In a separate small bowl, sift together the cocoa powder, flour, and salt.
- Gently fold the sifted dry ingredients into the whipped egg mixture in three additions using a rubber spatula. Be very careful not to deflate the eggs; use a gentle under-and-over scooping motion.
- Pour the batter into the prepared jelly roll pan and gently spread it into an even layer using an offset spatula.
- Bake for 10 to 12 minutes, or until the cake springs back when gently pressed with your finger. Do not overbake.
- While the cake is baking, lay a clean, thin kitchen towel flat on your counter and generously dust it with the 2 tablespoons of powdered sugar.
- Immediately upon removing the cake from the oven, turn it out onto the prepared towel. Carefully peel off the parchment paper.
- Starting from the short end, gently but tightly roll the hot cake and the towel together into a log. Place the rolled cake seam-side down on a wire rack to cool completely to room temperature (about 1 to 2 hours).
- While the cake cools, prepare the filling. In a chilled bowl, whip the heavy cream, 1/2 cup powdered sugar, and vanilla extract until soft peaks form. Add the blue gel food coloring and continue to whip until stiff peaks form. Reserve about 1/2 cup of the cream for the top decoration.
- Once the cake is completely cool, carefully unroll it. It will naturally curl up at the ends, which is fine.
- Spread the blue whipped cream evenly over the unrolled cake, leaving a 1/2-inch border around the edges.
- Gently reroll the cake (without the towel this time!), using the natural curve the cake has memorized. Place it seam-side down on your serving platter.
- Use the reserved blue cream to frost the top of the roll. Garnish generously with chocolate shavings and pastel speckled mini eggs. Chill in the refrigerator for at least 30 minutes before slicing.
3. Mastering the Art of the Roll: Essential Techniques
Let’s dive deeper into the rolling process, as this is where most bakers hold their breath. The towel you use matters! Avoid thick, fluffy terrycloth towels, as they can leave lint on your cake and are too bulky to create a tight spiral. A thin, smooth cotton or linen tea towel is perfect. The generous dusting of powdered sugar (or cocoa powder, if you prefer a darker exterior) acts as a non-stick barrier.
When you do the initial roll out of the oven, commit to the movement. Don’t hesitate. Roll it tightly but don’t crush it. And remember, if the worst happens and your cake does develop a small crack when you unroll it later to add the filling—don’t panic! That is exactly what the extra whipped cream on top is for. A little bit of decorative frosting and some cleverly placed candy eggs can hide any imperfections, making your dessert look rustic and charming.
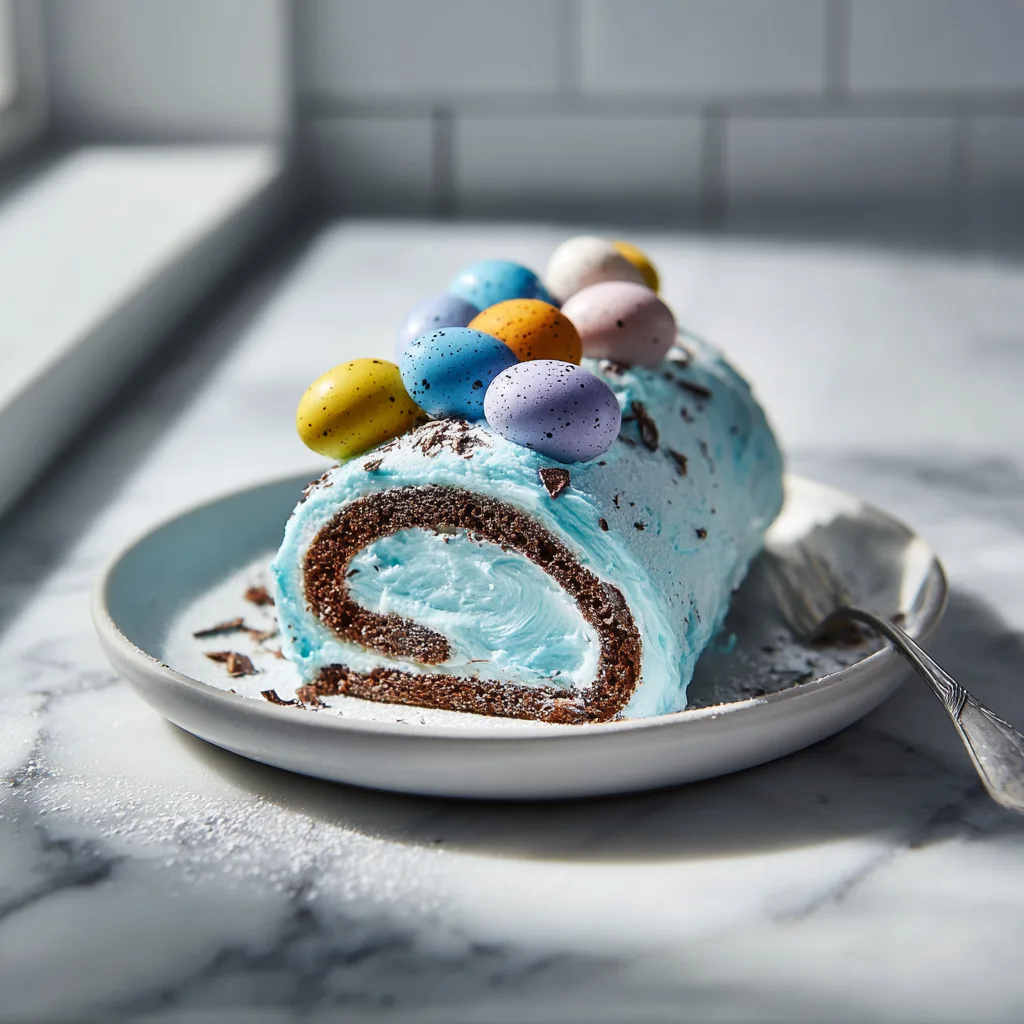
4. Whipping Up That Dreamy Blue Cloud Filling
The contrast between the dark chocolate sponge and the bright pastel filling is what makes this cake a visual masterpiece. To achieve that perfect, structurally sound filling, you must start with very cold heavy whipping cream. If your kitchen is warm, pop your mixing bowl and whisk attachment into the freezer for 10 minutes before you start beating.
When it comes to coloring, gel food coloring is highly recommended over liquid drops. Liquid coloring can thin out your whipped cream and alter its stability, while gel coloring is highly concentrated. You only need a tiny toothpick-swipe or a single drop of a “sky blue” or “teal” gel to achieve that gorgeous, robin’s-egg pastel hue. Whip the cream until it holds stiff, proud peaks—if it’s too soft, it will squish out the sides when you try to reroll the cake.
5. Decorating: Bringing the Springtime Magic to Life
Decorating is where you get to let your creativity shine! The speckled mini eggs are the star of the show here. You can use classic chocolate eggs with the crisp candy shell. Try chopping half of them up to sprinkle over the top so you get beautiful cross-sections of chocolate, and leave the other half whole for visual impact.
For the chocolate shavings, you can simply take a standard vegetable peeler to a bar of good quality dark chocolate. The dark chocolate adds a touch of bitterness that perfectly balances the sweet, creamy filling and the candy eggs. If you want to take it a step further, a light dusting of edible gold luster dust over the finished cake can add a truly magical, professional bakery touch.
Conclusion: A Slice of Springtime Joy
Baking should be a joyful experience, and the final result should bring a smile to the faces of your family and friends. This Easter Mini Egg Chocolate Swiss Roll does exactly that. By breaking down the steps and understanding the simple science behind a flexible sponge cake, you have empowered yourself to create a bakery-worthy dessert right in your own kitchen. Serve it slightly chilled with a hot cup of coffee or a cold glass of milk, and watch as your guests marvel at the beautiful blue swirl hidden inside. Happy spring baking!
Easter Mini Egg Chocolate Swiss Roll
Ingredients
Equipment
Method
- Preheat oven to 350°F (175°C). Line a 10×15-inch jelly roll pan with parchment paper.
- Beat eggs and granulated sugar on high for 5-7 minutes until pale and tripled in volume. Mix in vanilla.
- Sift cocoa powder, flour, and salt together. Gently fold into the egg mixture in three additions.
- Spread batter evenly in the prepared pan. Bake 10-12 minutes until cake springs back when touched.
- Dust a clean kitchen towel with 2 tbsp powdered sugar. Turn the hot cake onto the towel and peel off parchment.
- Starting from the short end, tightly roll the warm cake and towel together. Cool completely on a wire rack.
- Whip heavy cream, 1/2 cup powdered sugar, vanilla, and blue food coloring until stiff peaks form.
- Unroll cooled cake, spread with filling (reserving some for top), and reroll without the towel.
- Frost top with reserved cream and decorate with chocolate shavings and mini eggs. Chill before serving.