The Ultimate Guide to Soft and Chewy Milk Mochi: A Simple 3-Ingredient Dessert
If you’re a fan of unique textures and subtle sweetness, then you’ve likely fallen in love with mochi at some point. This traditional Japanese rice cake, known for its distinctively soft, chewy, and stretchy consistency, has captivated dessert lovers worldwide. While there are endless variations—from fruit-filled daifuku to ice cream mochi—sometimes the simplest version is the most satisfying. Enter Milk Mochi.
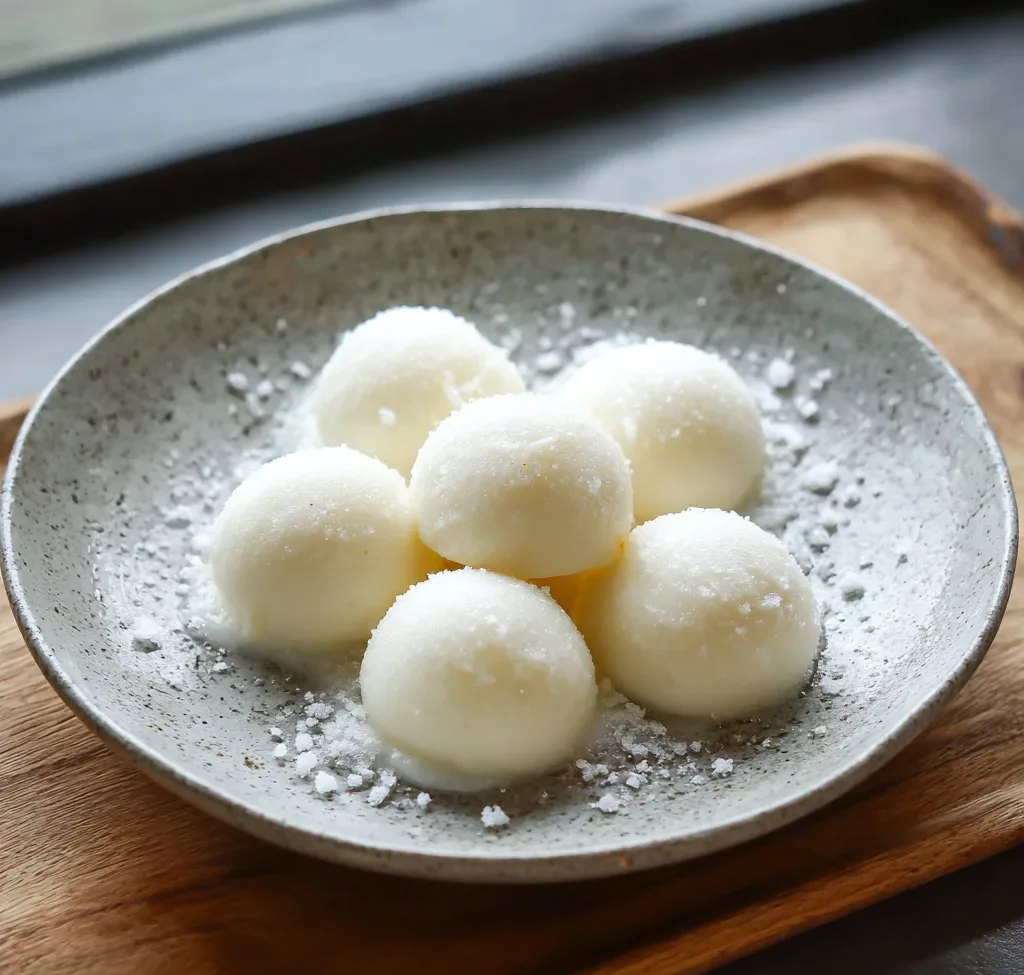
As pictured, this dessert is a study in elegant simplicity. It’s a pure, unadulterated celebration of the mochi texture, enriched with the comforting, creamy flavor of milk. Unlike some mochi recipes that require steaming and laborious pounding, this version is incredibly easy to make at home, often coming together in just a few minutes using a microwave or a stovetop. It’s the perfect quick-fix for a sweet craving, a delightful afternoon snack with tea, or a light dessert after a meal.
In this article, we will explore the magic of milk mochi, from understanding its key ingredients to mastering the simple technique that yields those perfect, pillow-soft bites.
Why You’ll Adore This Recipe
There are countless reasons why this milk mochi recipe deserves a spot in your regular rotation.
Incredible Texture: The star of the show is, without a doubt, the texture. It’s that quintessential “QQ” texture—a Taiwanese term for something that is delightfully chewy, bouncy, and soft all at once. It’s soothing to eat and incredibly addictive.
Minimal Ingredients: You likely have everything you need in your pantry right now. The core of this recipe is just three simple ingredients: milk, sugar, and glutinous rice flour. There are no hard-to-find gums or stabilizers, just wholesome staples.
Quick and Easy: Forget about complicated steaming setups or tiring arm workouts from pounding rice. This recipe uses a straightforward heating method that takes less than 10 minutes of active cooking time. It’s practically foolproof, making it a great recipe for beginners or cooking with kids.
Versatility: While the milky flavor is delicious on its own, this base recipe is a blank canvas. You can easily infuse it with other flavors like matcha, cocoa, or strawberry, or roll it in various toppings like crushed nuts, desiccated coconut, or traditional kinako (roasted soybean powder) for an extra layer of flavor and texture.
The Magic Ingredient: Glutinous Rice Flour
The secret to mochi’s unique texture lies in the flour. It’s crucial to use glutinous rice flour, also known as sweet rice flour. Despite its name, it contains no gluten. Instead, it has a high starch content, specifically amylopectin, which is what becomes sticky and stretchy when cooked with liquid.
Do not substitute with regular rice flour. Regular rice flour is made from long or medium-grain rice and will result in a hard, doughy texture that is nothing like mochi. Popular brands include Mochiko (a Japanese brand) or Erawan (a Thai brand), both of which work perfectly for this recipe.
Soft and Chewy Milk Mochi
Ingredients
Equipment
Method
- In a small non-stick saucepan, whisk together the glutinous rice flour, milk, and sugar until completely smooth and free of lumps.
- Place the saucepan over low heat. Cook, stirring constantly with a spatula, until the mixture thickens and comes together into a cohesive, sticky dough mass. This should take about 5-8 minutes.
- Remove from heat. Turn the dough out onto a surface generously dusted with cornstarch. Let it cool for a few minutes until safe to handle.
- Dust your hands and the top of the dough with more cornstarch. Gently knead a few times to smooth it out.
- Pinch off small, bite-sized portions of the dough and roll them into balls between your palms.
- Roll each ball lightly in cornstarch to prevent sticking and serve immediately. Brush off excess starch if desired.
Notes
Ingredients
Here is the simple list of what you need to make a batch of these delightful milk mochi bites.
- Milk: 1 cup (240ml). Whole milk will give the richest, creamist flavor, but you can also use 2% or even a plant-based alternative like oat milk or almond milk for a vegan version.
- Glutinous Rice Flour: 1 cup (120g). As mentioned, this is the non-negotiable ingredient for that signature chew.
- Sugar: 1/4 cup (50g). This provides a gentle sweetness. You can adjust the amount slightly to your preference, but don’t reduce it too much as sugar also helps keep the mochi soft.
- Cornstarch or Potato Starch: For dusting. Mochi dough is incredibly sticky, and a generous dusting of starch is essential for handling, shaping, and preventing the pieces from sticking together.
Instructions
This recipe can be made on the stovetop or in the microwave. The stovetop method gives you a bit more control, while the microwave is faster.
Stovetop Method (Recommended for beginners):
- Combine Ingredients: In a small non-stick saucepan, whisk together the milk, glutinous rice flour, and sugar until the mixture is completely smooth and there are no lumps.
- Cook over Low Heat: Place the saucepan over low heat. Cook, stirring constantly with a heat-proof spatula or wooden spoon. It’s important to keep the mixture moving to prevent it from sticking to the bottom or cooking unevenly.
- Form the Dough: As you cook, the mixture will start to thicken and become lumpy. Keep stirring vigorously. It will eventually come together into a cohesive, sticky, and somewhat translucent dough mass that pulls away from the sides of the pan. This process usually takes about 5-8 minutes.
- Cool: Once the dough has formed, remove the pan from the heat. Turn the sticky dough out onto a piece of parchment paper or a silicone mat that has been generously dusted with cornstarch. Let it cool for a few minutes until it’s comfortable to handle.
- Shape: Dust your hands and the top of the dough with more cornstarch. Gently knead the dough a few times to make it smooth. You can then roll it into a log and cut it into bite-sized pieces, or pinch off small portions and roll them into balls as seen in the picture.
- Serve: Roll the finished pieces in a final light coating of cornstarch to prevent sticking and serve immediately.
Microwave Method:
- Mix: In a microwave-safe bowl, whisk together the milk, glutinous rice flour, and sugar until smooth.
- First Heat: Cover the bowl loosely with plastic wrap (leave a small vent) or a microwave-safe lid. Microwave on high for 1 minute.
- Stir: Carefully remove the bowl and stir the mixture well with a wet spatula to break up any lumps.
- Second Heat: Cover and microwave for another 1-2 minutes, checking and stirring every 30-45 seconds. The mochi is done when it looks translucent, uniform in texture, and has pulled away from the sides of the bowl.
- Cool and Shape: Follow the same cooling and shaping steps as the stovetop method.
Tips for Success
- Use a Non-Stick Pan: If cooking on the stovetop, a non-stick pan will make your life much easier, as the dough is very sticky.
- Don’t Skimp on Starch: Be generous with the cornstarch or potato starch when handling the cooked dough. It’s the only way to prevent a sticky mess. You can brush off any excess later.
- Stir Constantly: Whether on the stove or after microwaving, vigorous stirring is key to creating a smooth, uniform texture without any uncooked flour pockets.
- Enjoy Fresh: Mochi is best enjoyed on the day it is made, as it tends to harden over time. If you must store it, keep it in an airtight container at room temperature for up to a day. Refrigeration will make it hard, but you can briefly microwave it to soften it again.
Delicious Variations
Once you’ve mastered the base recipe, try these fun twists:
- Kinako Mochi: This is a classic combination. Instead of plain cornstarch, roll your finished milk mochi in a mixture of kinako (roasted soybean powder) and a little sugar. The nutty flavor is a perfect complement to the creamy mochi.
- Chocolate Milk Mochi: Substitute the regular milk with chocolate milk, or add 1-2 tablespoons of cocoa powder and an extra tablespoon of sugar to the dry ingredients before mixing.
- Matcha Mochi: Whisk 1-2 teaspoons of high-quality matcha powder into the dry ingredients for a vibrant green color and earthy tea flavor.
- Stuffed Mochi: Before rolling into balls, flatten a piece of mochi dough and place a small scoop of red bean paste, chocolate ganache, or even a small piece of fruit in the center. Seal the dough around the filling and roll it into a ball.
Conclusion
Milk Mochi is a testament to the beauty of simple food. With just three humble ingredients and a few minutes of your time, you can create a dessert that is both comforting and delightfully unique. Its soft, chewy texture is unlike anything else, providing a sensory experience that keeps you coming back for more. Whether you enjoy it plain, dusted with kinako, or infused with your favorite flavors, this easy recipe is sure to become a cherished favorite in your kitchen. So go ahead, grab that bag of glutinous rice flour, and treat yourself to a little bite of chewy perfection.