Chocolate Peanut Butter Whoopie Pies Recipe 🍫
Chocolate and peanut butter create one of the most beloved flavor combinations in the dessert world, and these Chocolate Peanut Butter Whoopie Pies take that partnership to extraordinary heights. Imagine biting into soft, pillowy chocolate cookies that melt in your mouth, only to discover a luxurious layer of creamy peanut butter filling complemented by rich chocolate ganache. These whoopie pies aren’t just cookies – they’re an experience that transforms ordinary afternoons into special occasions and turns skeptics into devoted fans.
The beauty of whoopie pies lies in their unique texture and structure. Unlike traditional cookies that aim for crispness, these treats embrace softness, creating a cake-like consistency that’s incredibly tender. The chocolate cookie portion delivers deep cocoa flavor without being overly sweet, providing the perfect canvas for the indulgent filling. When you add creamy peanut butter and silky chocolate ganache between two of these delicate cookies, you create layers of flavor and texture that dance across your palate with each bite.
What makes this recipe particularly special is its accessibility. While the final product looks and tastes like something from an upscale bakery, the preparation process is straightforward enough for home bakers of all skill levels. You don’t need specialized equipment or professional training – just quality ingredients, a little patience, and enthusiasm for creating something truly delicious. The recipe yields twelve generous whoopie pies, making it perfect for family gatherings, potlucks, bake sales, or those moments when you simply want to treat yourself to something extraordinary.
🌟 Why These Whoopie Pies Stand Out
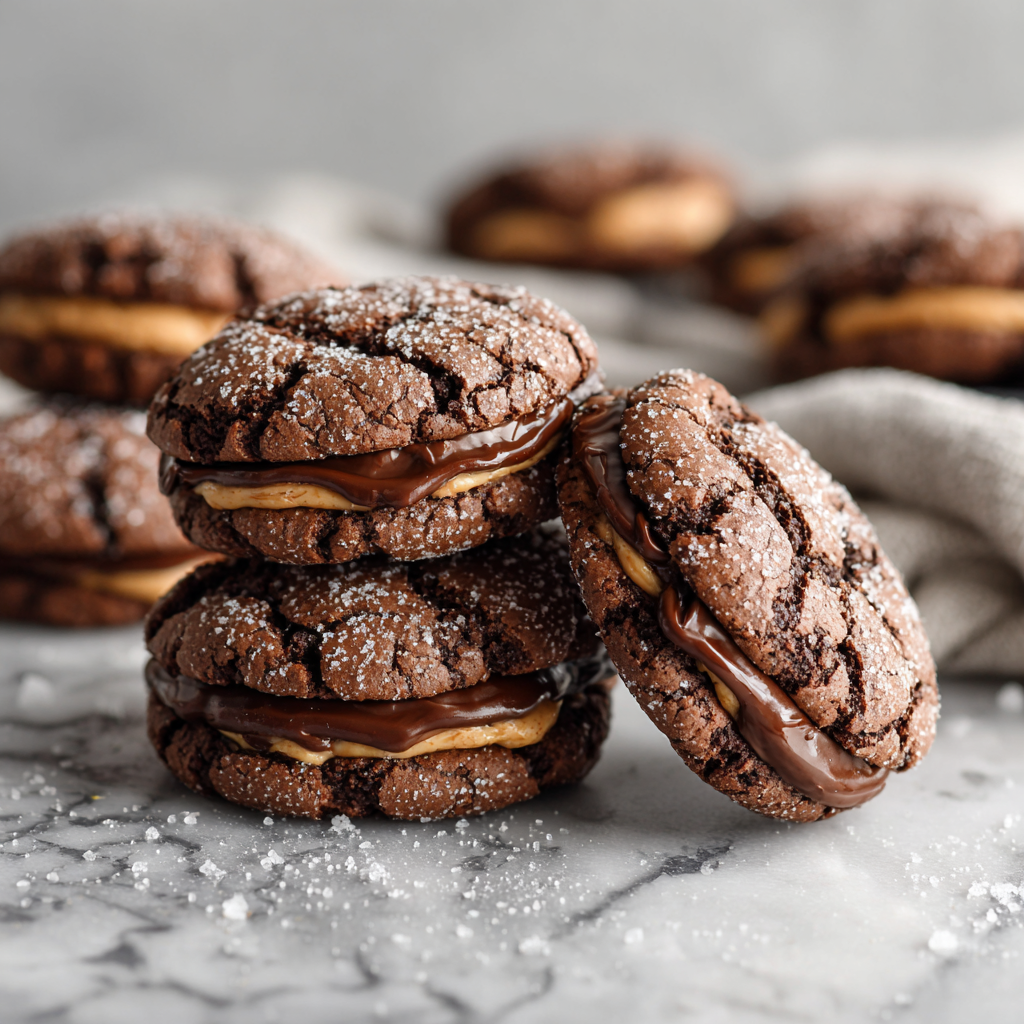
Traditional whoopie pies have graced American dessert tables for generations, but this chocolate peanut butter variation elevates the classic formula to new dimensions. The combination of textures creates an unforgettable eating experience – the soft, tender cookies provide a gentle give, while the peanut butter filling adds creamy richness, and the chocolate ganache introduces a smooth, luxurious element that ties everything together. The light dusting of powdered sugar on top isn’t just decorative; it adds a subtle sweetness that balances the rich chocolate and nutty peanut butter flavors.
These whoopie pies also offer practical advantages for busy bakers. They stay fresh for several days when properly stored, making them ideal for preparing ahead of events. The cookies maintain their soft texture remarkably well, and the filling doesn’t separate or become runny over time. This stability means you can bake them in the morning and serve them in the evening without any loss of quality, or even prepare them a day in advance for stress-free entertaining.
The visual appeal of these treats cannot be overstated. The contrast between the dark chocolate cookies and the lighter peanut butter filling creates an attractive appearance that immediately catches the eye. When arranged on a serving platter or cake stand, they become a centerpiece that guests gravitate toward. The rustic, homemade appearance adds charm while the careful dusting of powdered sugar provides an elegant finishing touch that suggests care and attention to detail.
🍪 The Secret to Perfect Chocolate Cookies
The foundation of exceptional whoopie pies begins with the chocolate cookies themselves. Unlike standard chocolate cookies that might prioritize crunch or chewiness, whoopie pie cookies need to achieve a specific texture – soft, cake-like, and tender enough to bite through easily without being fragile. This texture comes from the careful balance of ingredients and the proper mixing technique.
High-quality cocoa powder makes a significant difference in the final flavor. Dutch-processed cocoa provides a smoother, less acidic taste, while natural cocoa powder offers a more intense chocolate flavor with slight fruity notes. Either works beautifully in this recipe, so choose based on your personal preference. The cocoa combines with flour, leavening agents, and spices to create a complex flavor profile that goes beyond simple chocolate sweetness.
Brown sugar plays a crucial role in these cookies, contributing moisture and a subtle molasses flavor that enhances the chocolate without overwhelming it. The molasses content in brown sugar also helps the cookies stay soft and prevents them from drying out too quickly. When creamed with softened butter, it creates air pockets that make the cookies light and tender rather than dense and heavy.
🥜 Crafting the Perfect Peanut Butter Filling
The filling represents the heart and soul of these whoopie pies, and getting it right requires attention to both flavor and consistency. Creamy peanut butter works best for achieving a smooth, spreadable filling, though those who enjoy texture can experiment with crunchy varieties for added interest. The key is using a peanut butter that’s not overly oily – natural peanut butters that separate may require stirring and could affect the filling’s stability.
Powdered sugar sweetens the peanut butter while also providing structure to the filling. As you beat the softened butter with powdered sugar, the mixture becomes fluffy and light, creating a frosting-like consistency that spreads easily and holds its shape between the cookies. Adding the peanut butter to this base ensures even distribution and prevents graininess.
The chocolate ganache layer adds an element of sophistication that transforms these from simple peanut butter-filled cookies into gourmet treats. Made by combining chocolate chips with warm heavy cream, ganache provides a silky, rich complement to the peanut butter’s nutty flavor. The slight bitterness of semi-sweet chocolate balances the sweetness of the cookies and filling, creating a harmonious flavor profile that never becomes cloying.
🎨 Mastering the Assembly Technique
Assembling whoopie pies might seem straightforward, but a few techniques can elevate your results from good to exceptional. Start by ensuring all your cookies have cooled completely – warm cookies will cause the filling to melt and become messy. Arrange the cookies in pairs of similar size to create uniform sandwiches that look professional and balanced.
When applying the peanut butter filling, aim for consistency in the amount you use for each whoopie pie. Too little filling makes the dessert feel skimpy, while too much can cause the cookies to slide apart or make eating messy. A small ice cream scoop or cookie scoop works perfectly for portioning the filling, ensuring each whoopie pie receives the same generous amount.
The ganache can be piped or spooned onto the peanut butter layer, depending on your preference and the consistency you’ve achieved. Slightly cooled ganache that’s still fluid will spread naturally when you place the top cookie, creating an even layer. If your ganache has thickened too much, gently reheat it for a few seconds until it reaches a spreadable consistency.
📝 Ingredients
Cookie Batter:
- 2 cups all-purpose flour
- 1/2 cup unsweetened cocoa powder
- 1 teaspoon baking powder
- 1/2 teaspoon baking soda
- 1/2 teaspoon salt
- 1/2 cup unsalted butter, softened
- 3/4 cup brown sugar, packed
- 1 large egg
- 1 teaspoon vanilla extract
- 3/4 cup buttermilk
Peanut Butter Filling:
- 1/2 cup unsalted butter, softened
- 1 cup creamy peanut butter
- 1.5 cups powdered sugar
- 1 teaspoon vanilla extract
- 2-3 tablespoons heavy cream or milk
Chocolate Ganache:
- 1/2 cup semi-sweet chocolate chips
- 1/4 cup heavy cream
For Dusting:
- Powdered sugar
🔪 Instructions
- Preheat your oven to 350°F (175°C) and line two baking sheets with parchment paper to prevent sticking and ensure easy cleanup.
- In a medium mixing bowl, whisk together the all-purpose flour, cocoa powder, baking powder, baking soda, and salt until thoroughly combined and no lumps remain.
- Using a stand mixer or hand mixer, cream the softened butter with brown sugar for approximately three minutes until the mixture becomes light and fluffy with a pale color.
- Add the egg and vanilla extract to the butter mixture, beating well until fully incorporated and the mixture looks smooth and glossy.
- With the mixer on low speed, alternate adding the dry ingredients and buttermilk to the butter mixture, beginning and ending with the dry ingredients, mixing just until combined after each addition.
- Using a cookie scoop or spoon, drop rounded tablespoons of batter onto the prepared baking sheets, spacing them about two inches apart to allow for spreading during baking.
- Bake for twelve to fifteen minutes until the cookies are set and spring back lightly when touched, being careful not to overbake as this will make them dry rather than soft.
- Allow the cookies to cool on the baking sheets for five minutes before transferring them to wire racks to cool completely.
- While the cookies cool, prepare the peanut butter filling by beating the softened butter until creamy, then adding the peanut butter and mixing until smooth and well combined.
- Gradually add the powdered sugar to the peanut butter mixture, beating on low speed initially to prevent a sugar cloud, then increasing speed until fluffy.
- Add vanilla extract and enough heavy cream to achieve a spreadable consistency that holds its shape but isn’t too stiff.
- For the ganache, heat the heavy cream in a small saucepan or microwave until it just begins to simmer, then pour it over the chocolate chips in a heat-proof bowl.
- Let the cream and chocolate sit for two minutes without stirring, then whisk gently until smooth and glossy, creating a silky ganache.
- Once all components are ready and the cookies have cooled completely, turn half the cookies upside down so their flat bottoms face upward.
- Spread or pipe approximately two tablespoons of peanut butter filling onto each upturned cookie, creating an even layer that extends almost to the edges.
- Spoon or drizzle about one teaspoon of chocolate ganache over the peanut butter filling on each cookie, spreading gently if needed.
- Place a second cookie on top of each filled bottom, flat side down, pressing very gently to create a sandwich without squishing the filling out the sides.
- Dust the assembled whoopie pies lightly with powdered sugar using a fine-mesh sieve for an elegant, bakery-style finish.
🎁 Serving Suggestions and Storage Tips
These Chocolate Peanut Butter Whoopie Pies shine in various serving contexts. Present them on a decorative platter for parties, wrap them individually in cellophane tied with ribbon for gifts, or simply enjoy them with a cold glass of milk for an afternoon treat. They pair beautifully with coffee or hot chocolate, making them perfect for brunch gatherings or dessert buffets.
For optimal freshness, store the whoopie pies in an airtight container at room temperature for up to three days. If your kitchen is particularly warm, refrigeration extends their shelf life to five days, though you should allow them to come to room temperature before serving for the best texture and flavor. The cookies can also be frozen for up to two months – simply thaw them in the refrigerator overnight and bring to room temperature before enjoying.
Consider creative variations to keep things interesting. Add a pinch of espresso powder to the chocolate cookie batter for a sophisticated mocha flavor, or stir mini chocolate chips into the peanut butter filling for extra texture. Some bakers enjoy adding a layer of raspberry jam alongside the peanut butter for a PB&J twist, while others sprinkle chopped peanuts on the filling before adding the top cookie.
✨ Conclusion: Sweet Success in Every Bite
Mastering Chocolate Peanut Butter Whoopie Pies represents more than following a recipe – it’s about creating moments of joy and indulgence that bring people together. These treats embody everything we love about homemade desserts: they’re made with care, filled with quality ingredients, and designed to delight everyone who tries them. The combination of soft chocolate cookies, creamy peanut butter filling, and silky ganache creates a symphony of flavors and textures that satisfies on every level.
Whether you’re baking for a special occasion or simply want to treat yourself and your loved ones to something extraordinary, these whoopie pies deliver consistent results that impress. The recipe’s straightforward approach means success is within reach for bakers of all experience levels, while the sophisticated flavor profile ensures the final product tastes like it came from a specialty bakery. Every bite offers the perfect balance of chocolate richness and peanut butter smoothness, proving that sometimes the most beloved flavor combinations become classics for very good reasons.
Chocolate Peanut Butter Whoopie Pies
Ingredients
Equipment
Method
- Preheat oven to 350°F (175°C) and line two baking sheets with parchment paper.
- In a medium bowl, whisk together flour, cocoa powder, baking powder, baking soda, and salt.
- Cream softened butter with brown sugar for 3 minutes until light and fluffy.
- Add egg and vanilla extract, beating until fully incorporated.
- Alternate adding dry ingredients and buttermilk to butter mixture, beginning and ending with dry ingredients.
- Drop rounded tablespoons of batter onto prepared baking sheets, spacing 2 inches apart.
- Bake 12-15 minutes until cookies are set and spring back when touched. Cool on wire racks completely.
- Beat softened butter until creamy, add peanut butter and mix until smooth.
- Gradually add powdered sugar, then vanilla and cream until spreadable consistency is reached.
- Heat heavy cream until simmering, pour over chocolate chips, let sit 2 minutes, then whisk until smooth.
- Spread peanut butter filling on flat side of half the cookies, add ganache layer on top.
- Top with remaining cookies and dust with powdered sugar before serving.